Mega Man 2
- Duckfist's Mega Man 2 Tutorial
- General Information
- General Techniques
- Flash Man
- Heat Man
- Air Man
- Crash Man
- Metal Man
- Wily 4 - Purple Hell
Duckfist's Mega Man 2 Tutorial
Duckfist's Mega Man2 tutorial is an extremely informative resource
https://www.youtube.com/watch?v=mTGuCMf_Acw
General Information
Routes
Zips or Zipless
The major difference of the routes is zips. With zips, your route is focused on acquiring Item 1 as fast as possible. Without zips, item 1 is less important.
Yes-Zips
- Flash
- Depends
- Fastest: Heat then Air
- More accessible: Air then Heat
- See above
- Crash
- Quick
- Metal
- Wood
- Bubble
This route is focused on getting Item 1 quickly. It starts with Flash to get Item 3, needed for the Heat Man zip. WR pace goes to Heat second and executes "Fast Air". Slightly slower overall (with a much slower Air and a much fast Heat) is Air second and Heat third, using item 2 to skip the Yoku Block section.
Wood could be significantly earlier, if you wish to try Dog Zips and "get them out of the way". Most important is having Crash for Quick, and Metal for Wood & Bubble.
Zipless
Without zips, the focus is on Item 2 for speed and flying over long sections, which means Air early is a must.
Beginners will want to do Flash early, because Time Stopper allows you to skip some tricky sections in Air and Metal.
Once you get the hang of those sections, you'll want to do Flash later in the run to take advantage of his Metal Blade weakness.
In Normal mode, however, it actually saves more time to use Time Stopper on Metal Man's crushers than Metal Blade saves in the Flash Man fight.
Beginner Route
- Flash
- Air
- Quick
- Metal
- Bubble
- Heat
- Wood
- Crash
Advanced Route (Difficult Mode)
- Air
- Quick
- Metal
- Bubble
- Heat
- Flash*
- Wood**
- Crash**
** Wood and Crash are fully interchangeable.
* There is some flexibility as to where you place Flash in the route: it just needs to be after Metal but before Wood/Crash. Most runners put it after Heat, because F and 3 get in the way in the menu.
TAS Route
QMBFHAWC
- Quick
- Metal
- Bubble
- Flash
- Heat
- Air
- Wood
- Crash
The Zipless TAS takes an unusual route. While the category is ordinarily defined by Item 2 rides, doing Air Man without Item 1 loses 12 seconds. Several Item 2 rides have to be sacrificed in order to have Item 1 in Air. It's almost a wash, but it's 1.5 seconds faster overall, so that's what the TAS does.
You may wonder why you don't see this in top-level runs. While top-level runners are well equipped to do the Item 1 strats, they are scared off by the Item 3 climbs in Heat, particularly this one. The slightest mistake can make the whole route fall apart.
Another variation you can find in Seth Glass' old runs is a Bubble early route, which saves Metal for later to take advantage of F and 2,
but does a bit of an awkward Bubble stage with Q only. It's slower in Difficult, but it may be faster in Normal. More testing is needed.
True Weaknesses?
Mega Man 2's bosses often take extra damage from multiple weapons, so this is debatable. Much of this is not useful in the actual route, so check the individual stage pages. However...
Flash > Quick > Metal > Bubble > Heat > Wood > Air > Crash > Who Knows
- Crash is effective against Quick as well
- Bubbles are somewhat effective on Flash
- Metal is effective against Flash, and of course, Metal himself
- Wood Man is weak do just about everything.
Normal vs. Difficult
The North American release of the game introduced a difficulty select of Normal or Difficult. The Japanese release does not feature this option, but is equivalent to "Difficult" mode for gameplay.
Damage done by the player to enemies is is doubled in normal mode. Note that most enemies die in half as many shots (round down).
Normal mode also tends to produce more large drops than Difficult.
Though not a gameplay difference, North American "Difficult" mode features exceptionally longer "Weapon Get - Dr. Light Get Your Weapons Ready" cutscenes than the Japanese version, by approximately 30 seconds. These cutscenes are a set amount of time, and the Leaderboards on megamanleaderboards.net will automatically adjust times for proper comparisons.
MM2 Loot Table
(As posted by WarmCabin in discord)
```Difficult Loot Table:
Result | $4A pokes (hex) | Ratio | Percent --------------+----------------------+--------+--------- Nothing | 00-30, 61, 63, 64-7F | 78/128 | 60.94% Small Energy | 30-48 | 25/128 | 19.53% Small Health | 49-57 | 15/128 | 11.72% Large Energy | 58-5C | 5/128 | 3.91% Large Health | 5D-60 | 4/128 | 3.13% Extra Life | 62 | 1/128 | 0.78%Normal Loot Table:
Result | $4A pokes (hex) | Ratio | Percent --------------+------------------+--------+--------- Nothing | 00-1B, 62, 64-7F | 57/128 | 44.53% Small Energy | 1C-25 | 10/128 | 7.81% Small Health | 26-2F | 10/128 | 7.81% Large Energy | 30-4D | 30/128 | 23.44% Large Health | 4E-61 | 20/128 | 15.63% Extra Life | 63 | 1/128 | 0.78%
MM2 Frames for Weapon Get
A count of Frames for each weapon Get cutscene, in Japanese and English versions, provided by WarmCabin
"Note that Quickman on US is 112 frames slower than his fellow non-itemers, because fuck you. These are all post frame rule; in a full run, each intermission could be up to 7 frames slower."
| Japanese | English | |
| Air | 1590 | 2110 |
| Quick | 373 | 661 |
| Metal | 373 | 549 |
| Bubble | 373 | 549 |
| Flash | 1590 | 2110 |
| Heat | 1590 | 2110 |
| Crash | 373 | 549 |
| Wood | 373 | 549 |
| Total | 6635 | 9187 |
| Difference | +2552 |
General Techniques
Pausing In Jumps
Pausing in a jump will cause Mega Man to "beam in" again, resetting his falling speed. This can be used to extend jumps, such as the fall off the platform in Heat Man's stage before "The Item 3 jump", or to redirect a jump, like the fourth elevator room in Wily 4.
Zipping
This page notes general truths about zipping. For specific zips (such as the Good Wood zip), check their stage pages and Duckfist's Tutorial.
A-Trigger vs. B-Trigger
Several zips will refer to an A-Trigger or a B-Trigger.
A-Trigger zips require mega Man to be in position in the ceiling (or above the screen). The player then jumps (pushing A), and then 4-to-7 frames later, tap left. (NOT A+Left at the same time, but A-Then-Left)
If Mega Man is off screen, such as the Heat Man Zip or most beginner Bubble Man Zips, you must use the A-Trigger.
B-Trigger Zips use Mega Man's "throwing" animation, and tap left during the animation to trigger the Zip. Most Screen 2 Crash Man zips, and the Metal Man Zip use the B trigger.
Ladder Zips
Just like Mega Man 1, Mega Man can climb too high off a ladder and end up in the ceiling. This can cause Mega Man to zip.
- As part of the "Good Wood" zip
- As "The Sexy Zip" on screen 2 of Wily 4, and several other locations in Wily 4
- There are at least 2 locations where this can Zip the player into a bad situation, so use caution when grabbing the top of ladders.
- Wily 1 vertical section near the Sniper Joe
- Wily 4 screen 3
Vertical Screen Zips
The easiest one of these is probably in Wily 4, the screen with two false floors and a ladder up to the screen with a false floor above spikes.
By riding the item 3 next to the ladder until Mega Man pops into the ceiling, then pushing jump 3 times then up+left. Mega Man appears on the next screen at the very top, not needing to navigate the room.
This occurs in a few other places (the end of the first screen of Wily 1, the middle of Good Wood).
Gate Crashing
In several stages, you can zip through the ceiling all the way to the boss gate. (Quick Man, Wily 3, Wily 4, Wily 6)
You must push right at the X-Coordinate of the gate. The screen will only transition by "walking through the gate."
If you do note walk through the screen transition, you must take a death to respawn and try again. It should be noted that this cannot be done in Quick Man's stage, resulting in a true soft lock (you must reset).
"Zip Land"
There are several places, such as the Good Wood zip and Crash Man zips, where Mega Man is a screen or two ahead of what is visually on screen. This can be seen a little when a screen scrolls into view that is from the future, before visually resetting to "the correct" next visual screen.
Mega Man is walking through the time and space of the screen shown while the screen comes into view, but the game is tracking him on the screen it actually displays. Sort of.
This is a weird state that must be corrected before finishing the stage.
- In Quick Man's stage, Mega Man walks left "backwards" onto the correct screen.
- In Crash and Wood, an intentional death is used.
Zipping Too Far
Several stages have a Wily stage tacked onto the end of them in the game's memory. This is easiest seen in Wood Man's stage by zipping too far at the end of the Good Wood zip - You will beam into Wily 3. In this state, Mega Man cannot spawn the boss of the castle stage, and you must find a way to intentionally game over or otherwise reset to get back on track.
Switching To Heat Man For Pit Deaths
Several points in the speedrun, notably the intentional deaths in the Crash and Wood Man zips, switch to Heat Man's weapon for seemingly no reason and begin charging it before falling into a pit.
Mega Man 2's "death respawn timer" uses the sound effect of Mega Man dying - when the explosion sound ends, it respawns Mega Man. "Releasing" charged Heat Man overrides the sound effect, "ending" the timer.
It is faster to switch to Heat, charge heat, and then after dying RELEASE B to fire the charge, than waiting for the normal death timer.
This is true for any pit death in the game. You might also see this in Bubble or Air Man's stage when the runner wants an intentional Game Over in a no-reset scenario.
Flash Man
Flash Man - Stage
Flash Man's stage is at best minimally sped up by items and weapons, and Flash Man's Time Stop is a very useful utility. As such, Flash is done early if not first in most routes.
A few notes on the stage:
- There are subtleties to the movement to avoid hits from turrets better explained by some better than me, especially the second cannon.
- For the fourth screen, falling down the left side to the mini-turret, position Mega Man in the middle of the gap falling straight down to avoid the shot.
- Remember on "Normal" the tin-can-man goes down in one, and on difficult you will need to dodge the cans.
- Take the right-side path down from the second mech to take the top path on the final long screen.
- The top path here is the only place a Utility Item may be useful - Item 2 specifically. However you are unlikely to have it.
- For the very end, walk under the long platform with the mech on it, jump and barely move left onto the platform, then jump right to the corridor gate.
There is an e-Tank on the top of the last screen, however it takes a very long walk to collect.
Boss - Flash Man
Damage Table
To Flash
| Weapon |
Normal | Difficult |
| Buster | 4 | 2 |
| Metal | 8 | 4 |
| Bubble | 4 | 2 |
| Quick | 4 | 2 |
From Flash
| Contact | |
| Shots |
Flash's Pattern
Flash Man walks around the room for a few seconds, then activates the time stop. This freeze Mega Man in place briefly, then releases a spray of bullets.
Every time Flash takes damage, he will jump if he is on the ground. As such, the strat is focused on predicting his movement and firing shots where he will jump.
Main Stage Strat
The early shots are specifically placed to tag Flash when he jumps and keep Flash getting pummeled, as it will take 14 shots to defeat him before he uses Flash. The more time Flash is jumping, the more you have time to fire more lemons.
Refights
The refight with Flash is on a flat surface, unlike the main stage fight. Simply firing Metal Blades at alternating heights, low-high-low-high(-low-high-low) is enough. Just remember to move off the teleporter if you need the health.
Heat Man
Heat Man Screen 1
Most of this screen is trivial - hold right and shoot enemies.
The Item 3 Throw Section
Switch to item 3 after walking off the high platform. Pause and switch to item 3 here - pausing itself (even without switching weapons) resets the falling speed so you reach the lower platform.
The item 3 throw is rather precise. The backup is to instead switch to item 2, or just platform normally.
Heat Man Screen 3 - Part 1
Zipping
Do not drop off the ladder when entering screen 3. You can hold down in the screen transition to grab the ladder if you press A to drop down the ladder. (You can also set up the zip from the floor, but it takes several more seconds.)
There is a very specific placement of item 3 from the ladder, against the left wall, for the optimal setup.
Stand on the left edge of the item 3, so Mega Man is mostly under the ceiling, not the ladder gap. Wait for Mega Man to suddenly move above the screen, then execute the A-Trigger Zip (https://goodboyrush.net/books/mega-man-2/page/zipping )
Zipless
The strategy for Zipless relies on using Item 2 as a platform, while keeping enough energy left over to fly across the disappearing block gap (in screen 3 part 2).
Heat Man Screen 3 - Part 2
This covers the long disappearing block portion of Heat Man's stage.
With Item 2
If you are playing Zipless, or did Air second, you will have item 2. Walk along the bottom up to the lava, then use item 2. Depending on how much energy remains, you may need to jump near the end.
Note that while this is the fastest (and safest) method for Heat Man's stage itself, in a Zips route, it is slower overall than doing Heat Second and then "Fast Air" using Item 1.
Without Item 2 (Heat Second)
Typically this only comes up for with Zips and Heat second, or for challenge runs (such as buster only), although in a race scenario this may be needed if you had an accident.
The blocks spawn starting from when their X coordinate appears on the screen, so always be moving to the right.
Get to the Lava pipe, and stand on the left edge of it facing right. You will need to time the jump so Mega Man is "in" the block at his highest point. The appearing block will place Mega Man on top of it as it appears.
In progress
Air Man
He can't be beaten.
He is early in most Any% routes to acquire Item 2
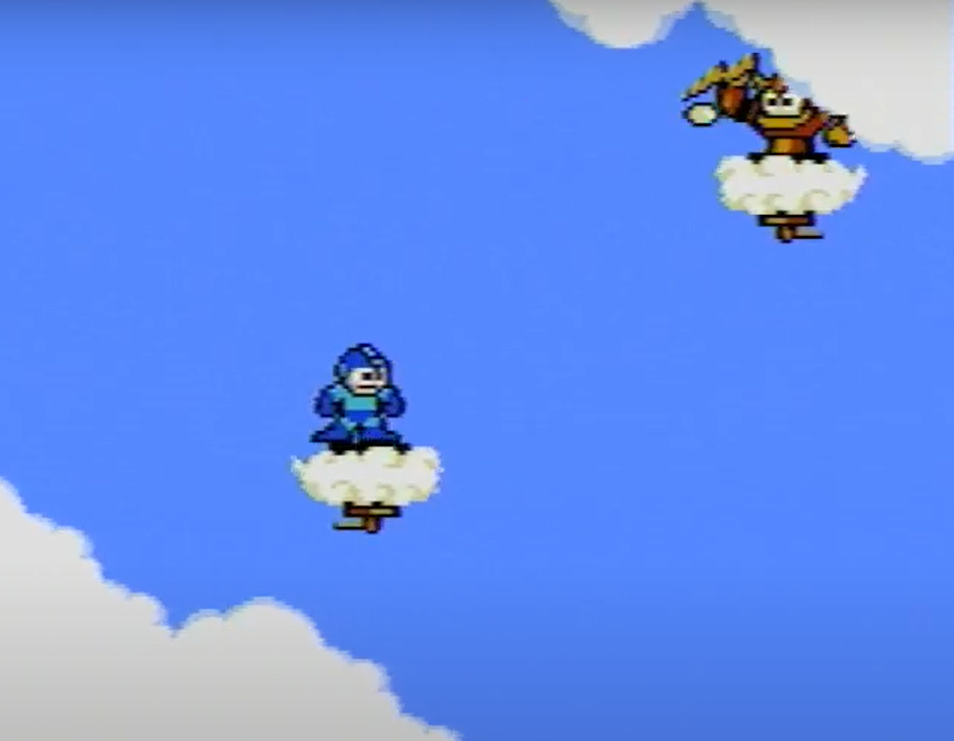
Air Man - Lightning Lords & Fast Air
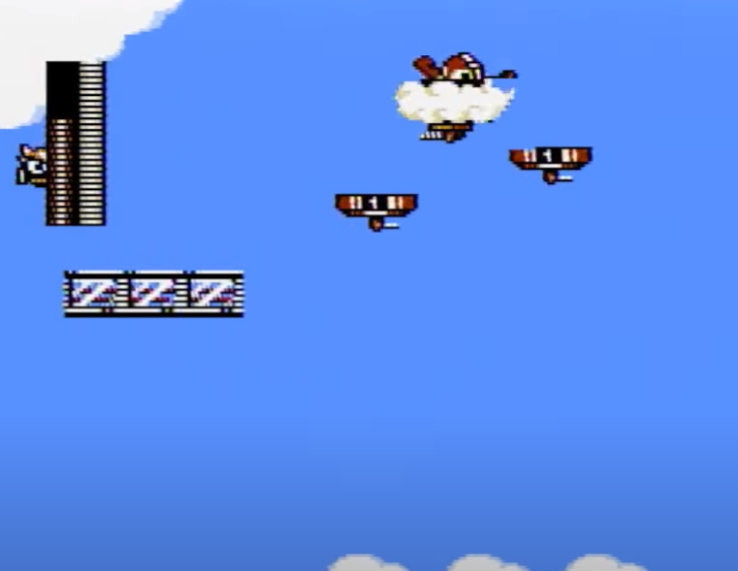
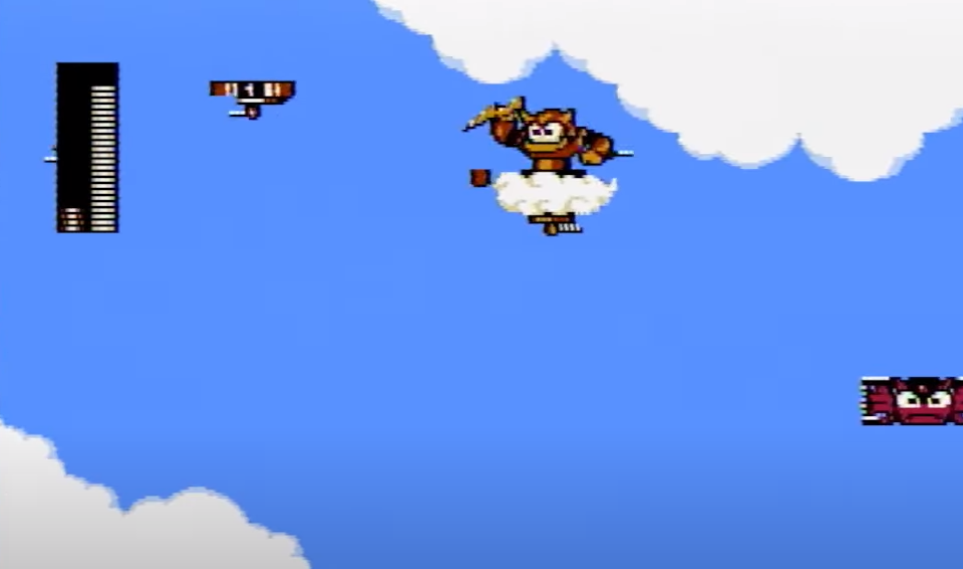
The "second half" of the first screen of Air Man is a long chasm with "Lightning Lords" on cloud platforms.
Intended Strategy
The intended strategy is to shoot the Lightning Lords and ride their platforms across.
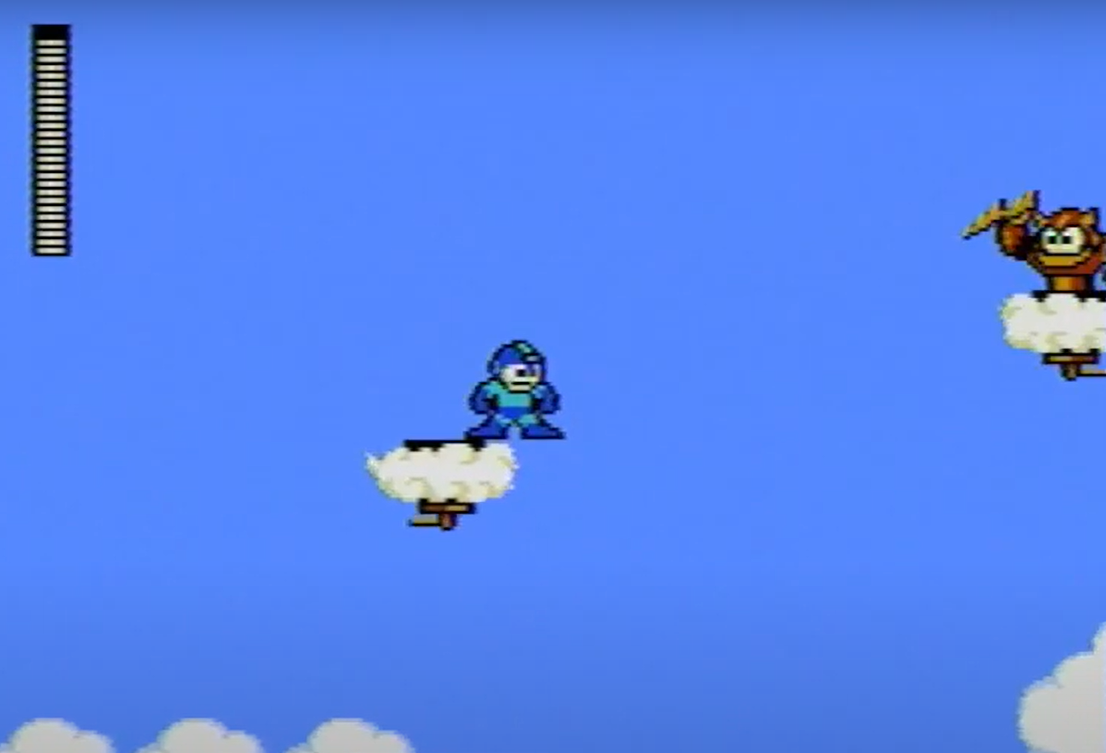
The clouds spawn at a set "X-Coordinate" in the stage, so you can speed things up by frames by standing as far to the right as possible on a platform.
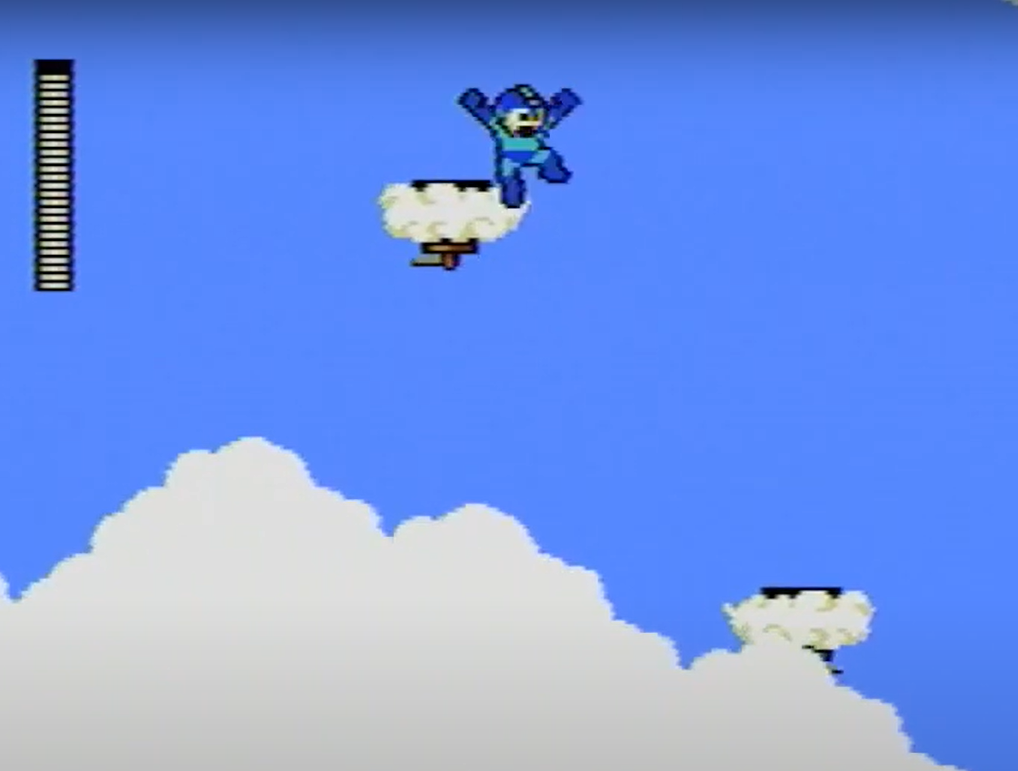
The Super Jump
On "Difficult" you may need extra mashing to take down the Lightning Lord fast enough
This method tries to speed up the last jumps of the chasm while riding platforms. It saves a few seconds but not a lot.
On the third platform, wait until you're above this little dip in the cloud. Then jump to the platform on your right. Hold Right.
You need to continue right, jumping to the next Lightning Lord cloud, mashing the enemy down without getting knocked back (and falling into the pit)
Walk directly across the platform (or take a small hop if you're brave) then full jump for the platform. You will likely need to pause to reset Mega Man's fall speed once or twice to make the jump.
The more you pause, the less time you're saving over just riding the platforms.
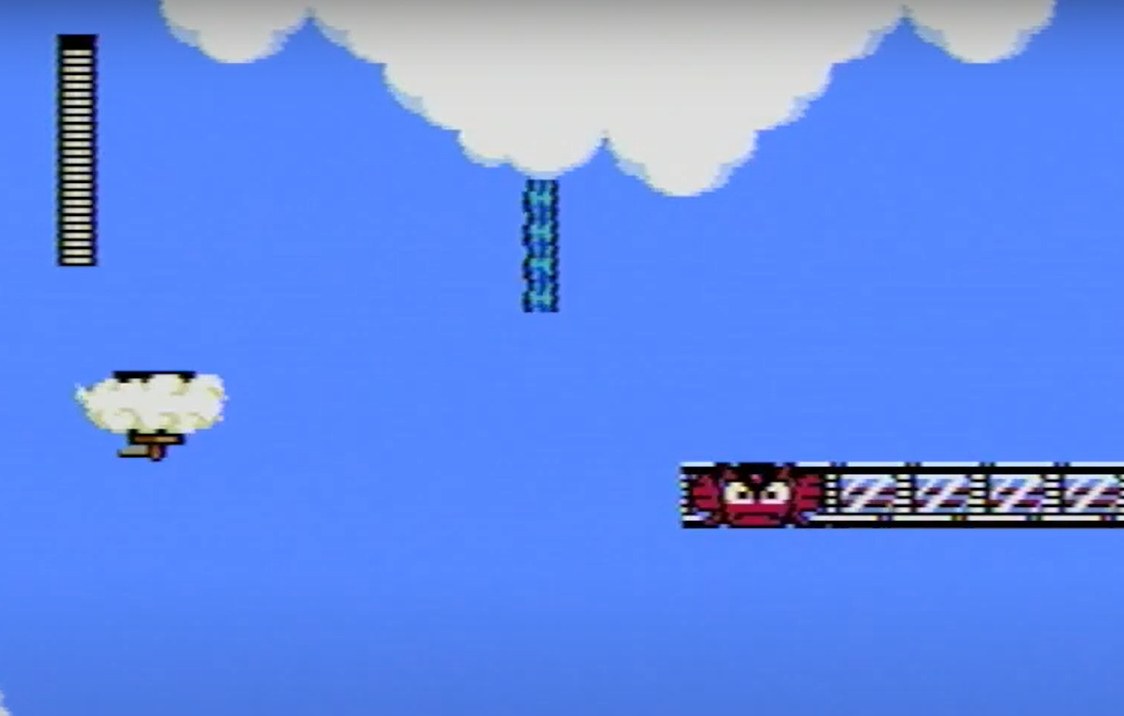
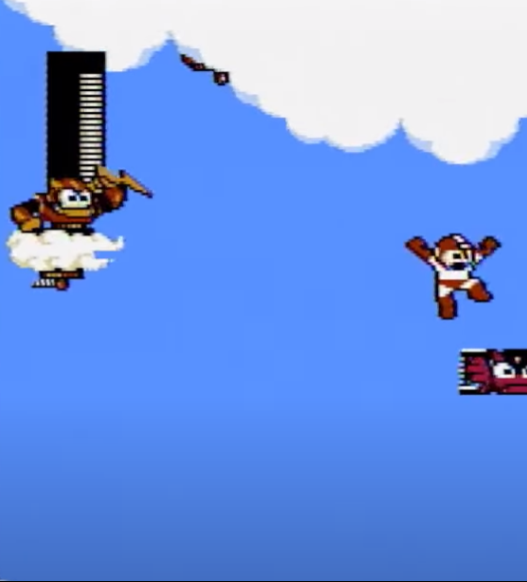
Fast Air
This is hard. Until you are chasing a high level time, this is not recommended
"Fast Air" and its cousin "Safe Fast Air" are methods of crossing this chasm with Item 1. This is the primary reason to do Heat Second and Air Third instead of the other way around.
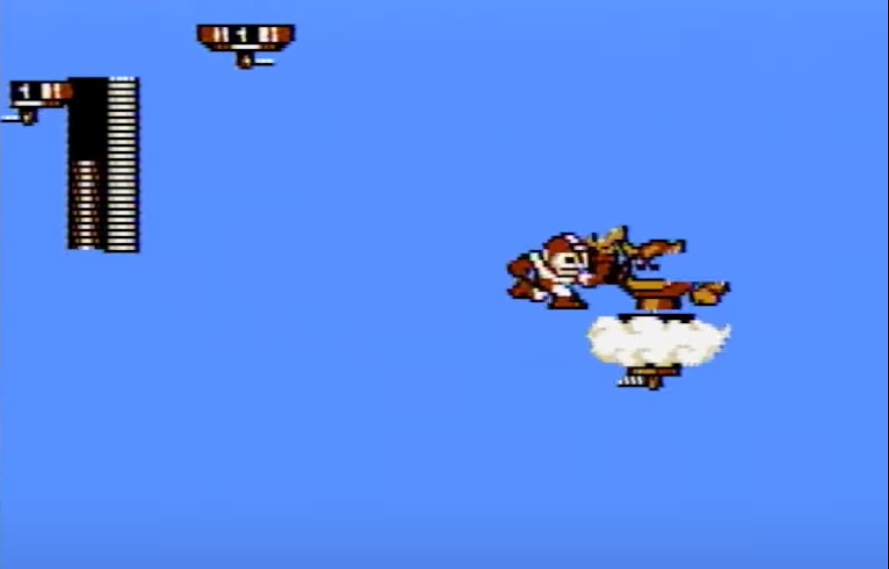
(The images below are taken from Cyghfer's PB as of December 11, 2023)
From the end of the starting platforms, you can attempt to despawn the first Lightning Lord by wiggling around this spot.
Most of this trick involves pressing A+B (Jump+Shoot) at the same time. This puts the follow on platforms at the lowest possible height. You have to do this to keep the platforms on the screen so Mega Man can land on them
Note that knock backs in Mega Man 2 happen according to the direction an enemy is facing, as opposed to Mega Man always going backwards. If you fail to deapawn the Lightning Lord, you need to get knocked to the right to stay on your platforms.
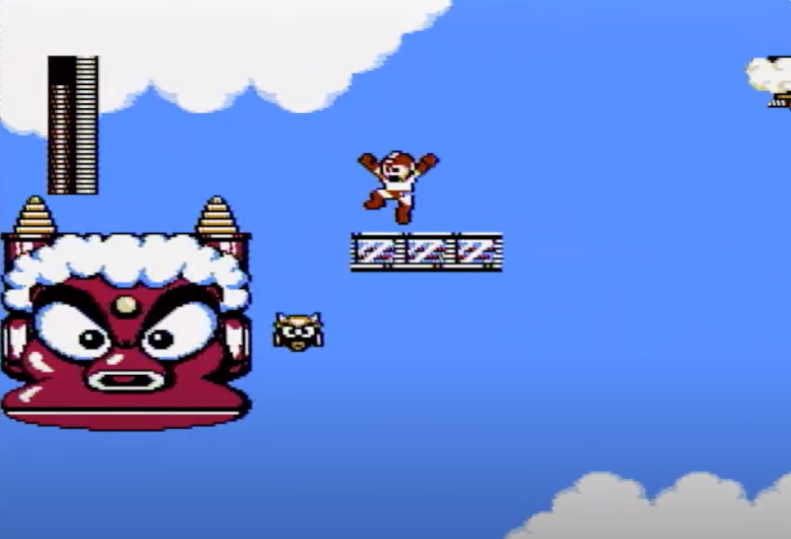
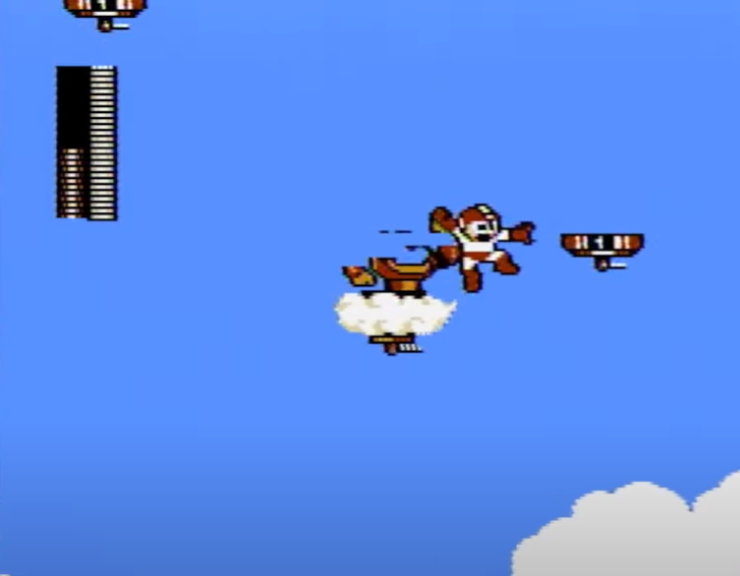
After three item 1s, you should reach the top of the screen. Jump to the edge of the next Cloud platform, without contacting the enemy.
If you are going for "Safe" fast air, aim to jump on the left half of the Lightning Lord. If the enemy turns right, Mega Man will be knocked back to the right, into the abyss. Getting knocked back in the direction the platform is moving will keep you in the air.
If you took damage, walk through the Lightning Lord. Otherwise, jump over the enemy and land on the right edge of the platform. Then proceed to use more A+B jumps with Item 1
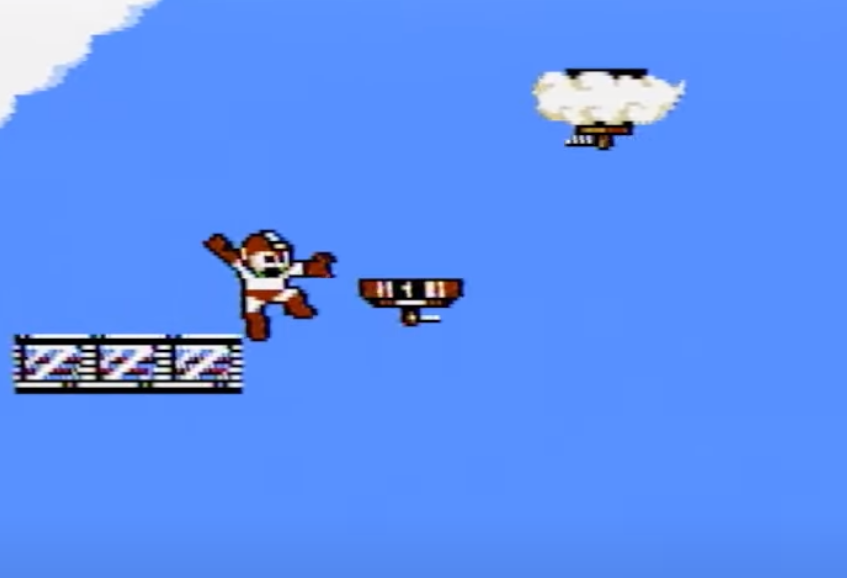
Use two Item 1s to jump to the next Lightning Lord. Again, jump to the edge of the platform. Here, use one more Item 1 to jump over to the next Lightning Lord.

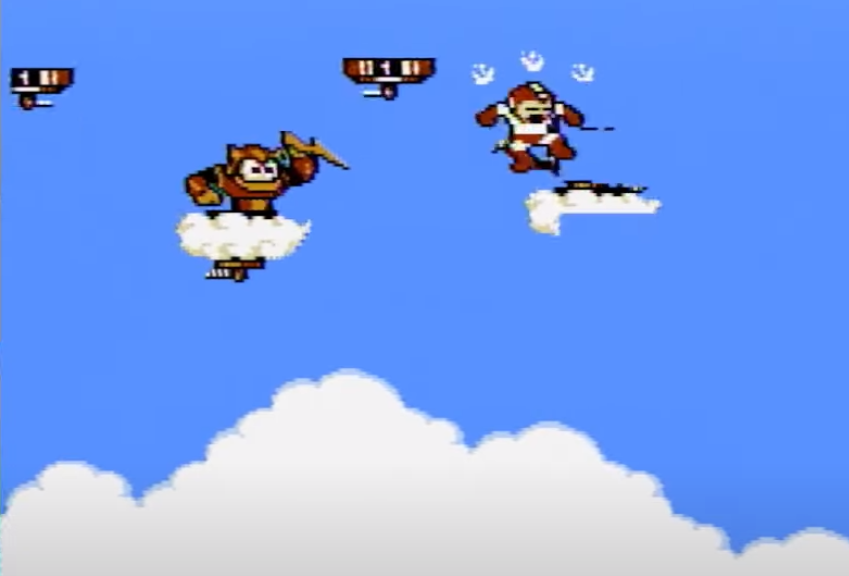
(You can just see Mega Man's left foot through the lag here, landing on the left edge of the platform.
One more Item 1 (it's in the clouds) and you can clear the chasm.
Crash Man
Crash Man - Boss Fight
Crash Man is weak to Air Man's Air shooter. He jumps when you shoot, but the exact angle is slightly random. If there are no Crash Bombs on the screen when he jumps, crash will also shoot at Mega Man.
On the US-normal mode, Crash Man takes 2 hits from the Air Shooter. On Difficult, he takes 3.
On a basic level, you want to jump at Crash Man and shoot towards him to bait him into the shot. In a damageless scenario you can typically walk under his jump and avoid the bomb. Optimally you bring Crash in close so you can hit him twice with one shot (especially on difficult).
Refights Patterns
As posted by Aurel in the Mega Man 2 channel - These gifs apply to Normal Mode.
Low Jump pattern
Jump and Shoot once at the peak of your jump, then jump and shoot again before landing on the mine. The second shot should kill a jumping Crash Man and let you teleport out instantly. (Obviously this means no health refill)

High Jump Pattern
Similar to the low jump pattern to start, but this one requires taking a hit to go fast.
Metal Man
Boss - Metal Man
Damage Table
Values are for "Difficult". Double them for "Normal"
| Buster | ? |
| Quick | 4 |
| Metal | 14 |
Strat
Metal Man is programmed to jump and attack if one of these three scenarios is true
- The player presses (but not is already holding) B
- the player crosses the center of the room
- a few seconds have passed without either of situations (1) or (2) above happening
As such, the easiest way to attack Metal Man is to enter the room with Quick Boomerangs equipped and already holding B. As long as you do not cross the middle of the room, Metal Man will just stand there....almost.
Difficult vs. Normal
On Normal, you can just go in with this technique and defeat Metal Man with 4 boomerangs. On difficult, you can only land 6 hits before Metal Man jumps and attacks anyway.
You can accept this and just hit Metal Man after he lands, but there is a faster strat that makes Metal Man jump early and then never again.
Refights
Metal Man is famously weak to his own weapon - on Normal Difficulty it one shots him.
Jumping in place and firing three Metal Blades is typically enough to finish the refight. Just remember to move off the teleporter if you want the health so you are not immediately beamed out.
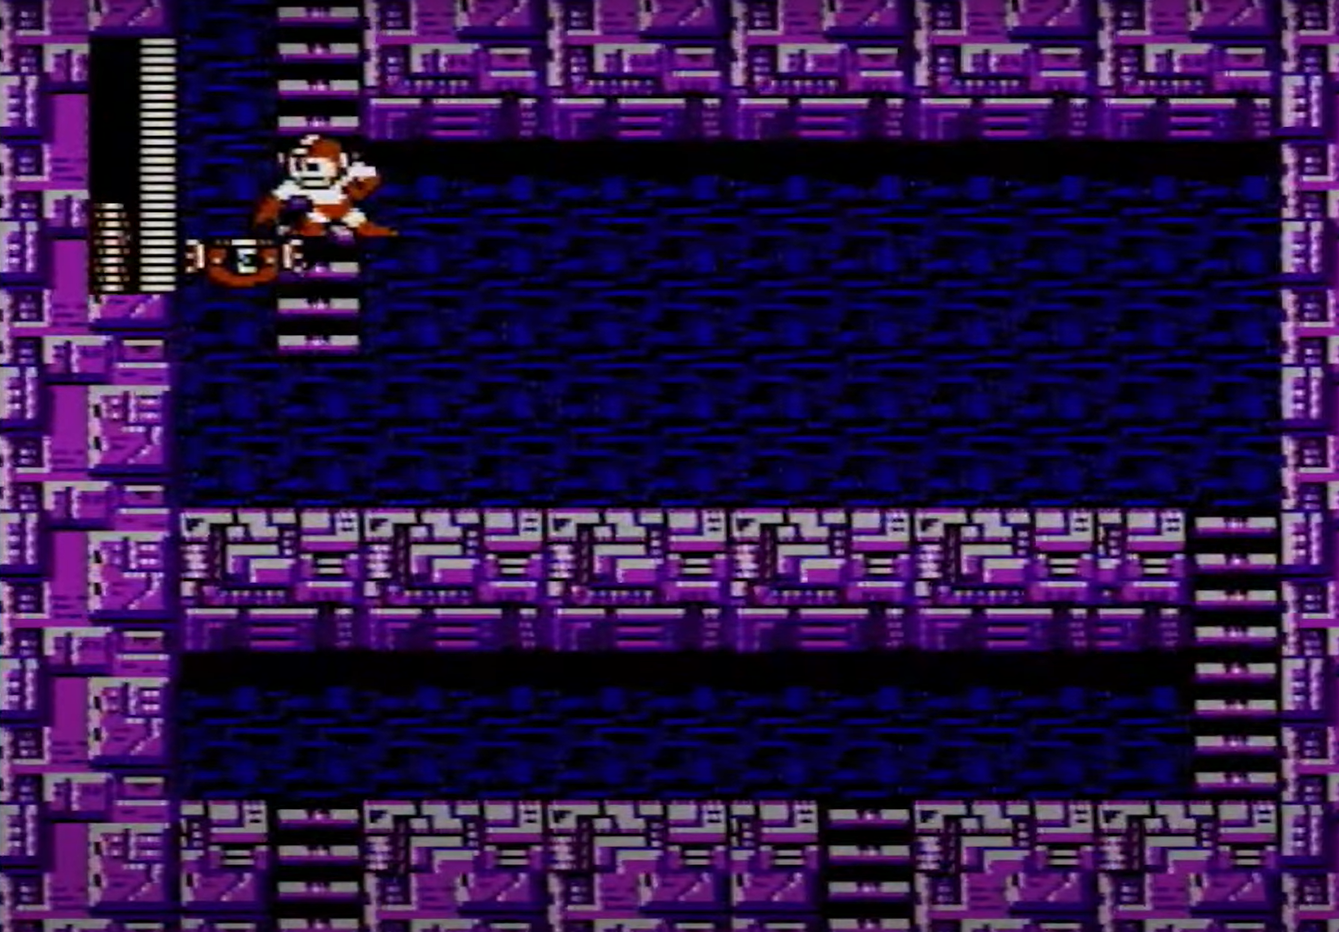
Wily 4 - Purple Hell
Wily 4 Beginner Strats
Finding False Floors with Bubble
Several screens in the first half of the stage have false floors. While skilled runners likely have these locations memorized, you can use Bubble to locate them ; Bubble will fall through the gaps.
The E-Tank
The E-Tank room before the checkpoint contains false floors. The easiest way to get the E-Tank is to use Item 1 from the middle level to reach the top level.
Leaf Shield on Elevator
The Leaf Shield will destroy Teles without despawning. Remember the leaf shield does not fly away until you push a direction on the D-Pad, so you can stand still on a platform, or even push A to drop from a ladder, without losing your leaf shield.
Air and Quick Boomerangs on Mechs
Quick Boomerang is the most effective way of defeating the Mechs and Sniper Joes in the final screen. Air Shooter is also very effective against the mechs, but we recommend Quick for its effectiveness against both the mech and the Joe.
Boo Beam
Boo Beam is an annoying boss as it can only be defeated by Crash Bombs, which you can only have 7 of. Casually this boss is highly annoying, and even in a speedrun a single mistake can kill the run.
Whether you zip into this room or come in the main entrance, it is critical you have your ammo usage and path through the room planned out ahead of time.
Casual Requirements
You have exactly enough ammo to destroy the 5 cannons, and the 2 walls directly blocking cannons (bottom right and middle-left), and nothing else.
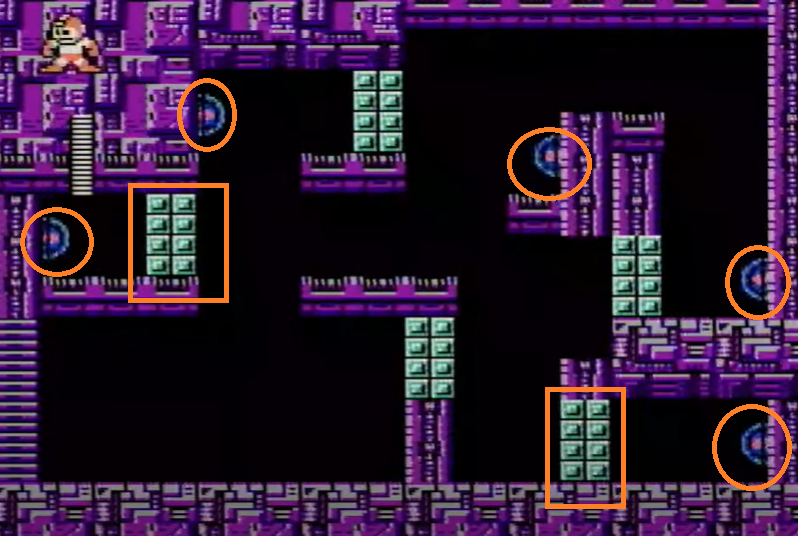
Without any double hits, you probably want to use item 1 to reach the top left cannon's platform from the start of the room. You can also use item 2 as a platform to the middle. It is possible to jump from the middle to the top around the ledge. Do not destroy the bottom-middle wall unless you know what you're doing.
Remember you can only "escape" the middle-right cannon's pit with item 3 (there is not enough room to spawn Items 1 or 2). Item 3 is also the easiest way to get out of the bottom right area.
Doubles Hits (Without Damage Transfer)
There are 2 places in the room you can destroy two things with one bomb, potentially saving ammo and time.
Top Left
You can destroy the top-most left cannon and the wall blocking the left-most cannon with a single bomb. This is much more forgiving than the others, and destroys two things you must destroy anyway, so you should always go for this.
Bottom Right
You can destroy the bottom two walls on the right side with a single Crash Bomb, however this placement is significantly tighter than the top left. Additionally, you only need the destroy the bottom wall, so missing can be catastrophic.
Destroying both walls does three things.
- Destroying the bottom wall is required anyway.
- Destroying the upper wall saves time for any method of destroying the middle right cannon, even without a damage transfer.
- Destroying the upper wall allows you to attempt a damage transfer, which can save a crash bomb
Extra Crash Bombs in Wily 5
Executing the top left and not using an extra bomb on the bottom right gives you only one extra bomb.
Executing both double hits AND a Damage Transfer (see below) gives you two extra crash bombs for Wily 5.
Each extra crash bomb significantly reduces the time needed to defeat the Wily machine.
The Damage Transfer
Many people have seen a player walk into the bottom right cannon and it mysteriously gets destroyed. This is the damage transfer.
You need enough health to survive the attempt.
Top Setup
You can stand on the top middle platform, and take a shot from the top-center cannon. Don't get hit again, and you should be able to end the fight by damage transferring it into the bottom cannon.
Jump Setup
A common setup is to have the bottom two walls destroyed and destroy the bottom two cannons. Get close to the middle-right cannon, then jump and shoot your bomb just over the cannon without destroying it and hold right against the wall. Mega Man will fall against the cannon. You need to then walk all the way around and into to the bottom-right cannon while the explosion is ongoing.
Shoka Setup
I'm not as familiar with this one but it involves walking into the middle-right cannon.
Why Does This Work At All?!
It has something to do with the last spot Mega Man took damage and the ongoing explosion.
Backup - Avoiding Damage with Pausing
Besides the obvious "get good and dodge", there is a pause trick to avoid damage. When you see the cannons flashing and about to fire, you can "mash start". The shots from cannons will pass harmlessly through Mega Man's teleport animation, and you will pause again (to restart the animation) before they can damage Mega Man. Somewhat obviously, this "wastes time" as you cannot act during the animation, and pausing the game itself takes time, but
Backups for No-Reset
If you run out of ammo, this is typically always a reset, especially after a few deathless runs are completed. That said, you may need a race or other no-reset backup.
The most important thing to remember is that while the cannons respawn, the walls do not unless you game over. If you know you will not be able to finish the fight, you have two options.
Immediate Game Over
Depending on how many lives you have left (or if you know you have none), a game over is a fast way of refilling ammo to Crash without having to farm Crash (or any Item 1/2/3 you use in the fight). However, remember all walls will respawn.
Farming for Ammo
If you're comfortable redoing the elevator rooms with your current Item ammo, and farming the Joes for ammo, you can destroy the walls and come back. The walls don't respawn, so use what Crash you have left to clear out the required walls. You could destroy more, but that's more ammo you will need to farm back. You need 5 Bombs for all cannons (4 if you know the damage transfer).
You can farm ammo from either the telles in a safe spot, or the Joes in mechs. For the Joes, use Quick Boomerangs to clear out the Joes, scrolling back and forth.
Remember to switch to Crash Bombs before collecting Ammo. It's also easier to farm in Normal mode than Difficult.
Due to the difficulty and randomness in farming, you may want to just take the game over on the spike rooms of the elevator section anyway.
Other Backups
Climbing with Double Item 1
This is also useful in Zipless, where you must enter through the main entrance gate.
This is similar to item 1 placements in Wily 1 and 2, where you jump and place an item 1 at the top of the jump, then a second one as you land, along you to jump to the first platform and then the second and gain significant height.