This tutorial only covers the 8 robots and all bosses
# General Information # Route Information There are two main routes for speedrunning Mega Man 4. They are largely even in length except for the Grasshopper Skip. While "The Nintendo Power Route" suggests Toad first, speedrun routes do either Bright or Pharoah first. The final 6 stages are the same for each route, so there is very little variation. For reference, Weakness Order is Bright->Pharaoh->Ring->Skull->Dive->Drill->Toad->Bright. However, it is faster to kill Pharaoh with the Buster. ### Bright First vs. Pharaoh First If you do Bright first - You can clear the first screen of Pharoah with enemies frozen, drastically reducing the need to mash against the scorpions, and the chances of a bee hitting you out of the air in the Balloon jump. - You'll also have Pharoah Man's weakness, but as noted above, it's faster to defeat him without using it. If you do Pharaoh first - You have Pharaoh shot for the second half of Bright Man's stage, giving you diagonal shots against the darkness inducing enemies. - You'll have Pharaoh Shot for Bright Man himself, which is slightly faster than using buster - As an advanced strat, you can use Balloon in the Grasshopper section, the biggest and hardest difference between the routes. ### Bright...Fourth? In theory, the first stage you truly need Bright is Skull Man. There was once a school of thought to do Bright Fourth as a result to save menu time. # General Tricks # Balloon Jumping When a Balloon is placed into a wall, it remains there for about **16 frames**. This gives you time to land on the despawning ballon and jump again. This is most obvious in Ring Man's stage, and Cossack 2. #### [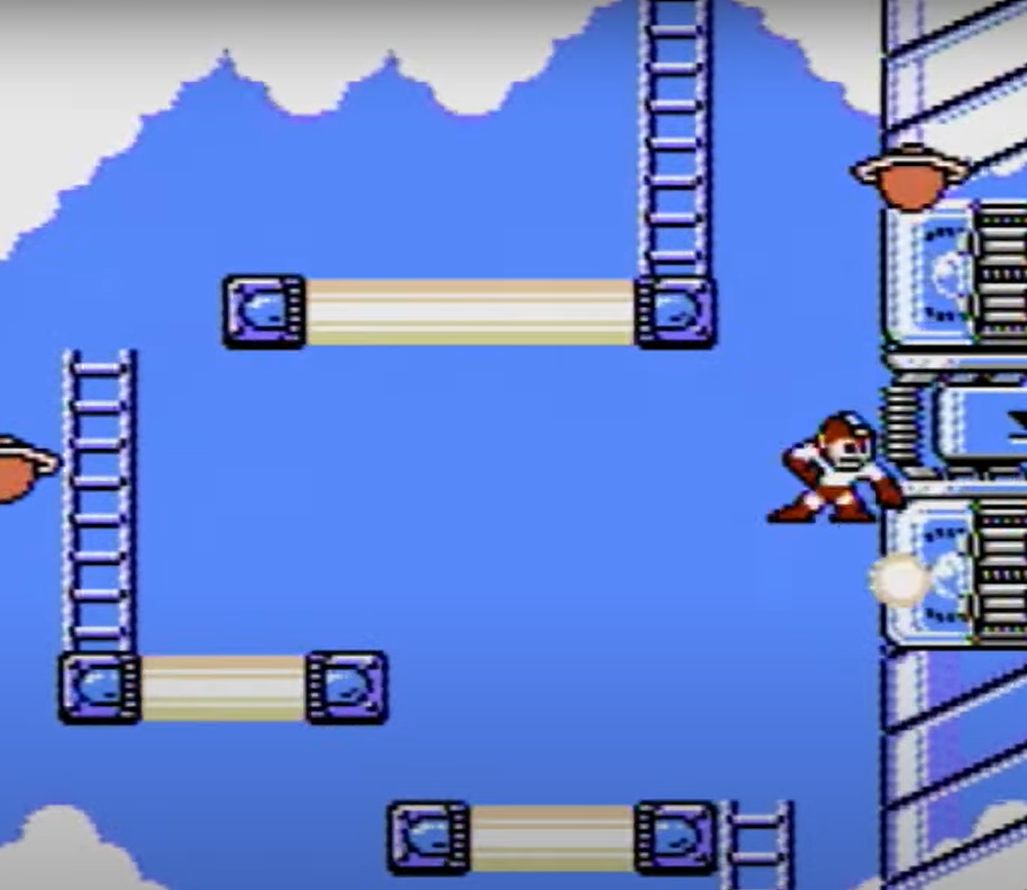](https://goodboyrush.net/uploads/images/gallery/2023-11/4IMimage.png)Its worth noting that the time might be reduced due to when you land on the balloon. So placing it weirdly might cause issues
While only used at top level, balloons have a weird quirk while climbing a ladder. See normally balloons are just placed straight to the direction Mega Man is facing. [](https://goodboyrush.net/uploads/images/gallery/2024-07/fceux-5o93myn0qg.png) However by standing on specific pixels, the balloon will be offset downwards, which allows Mega Man to land on it. We call these specific placements **Ladder Balloons** they dont have a lot of usage in the run, but it's a very nifty trick. [](https://goodboyrush.net/uploads/images/gallery/2024-07/fceux-zhse3lpa8e.png) This can allow Mega Man to skip all the climbing here for instance. See [Cossack 2 spike room](https://goodboyrush.net/books/mega-man-4/page/spike-room) for more details about it. [](https://goodboyrush.net/uploads/images/gallery/2024-07/fceux-srdc2ewk46.gif) #### Considerations You can't be completely against the wall when you shoot. You still need to move forward onto the balloon. Speedrunners joke that "16 frames is a literal eternity", but that's still less than half a second. Despawning the balloon is not only useful for getting up tight passages, but it **ALSO** reduces lag by immediately removing the balloon from the screen. # Rush Teleporting on Damage In Mega Man 4 (as well as some ROM Hacks of it), Rush will teleport under Mega Man when he takes damage. This is actively used in the run as a strat and a race-backup. ### Rush Coil in Pharaoh Balloon Jump By having (unused) Rush Coil on screen, if you take damage in the balloon jump from the bee, Rush will "save" Mega Man. ### Wily 2 Jet Boost On the last long screen before the boss door of Wily 2, you can take a damage boost to pull Rush Jet along faster. # Extending Flash Stopper Duration If you pay attention, Bright Man's Flash Stopper lasts longer if you slide. The "duration timer" does not count down while Mega Man is in a slide, so by extending the slide, you make the frozen enemy effects last longer. This allows long rooms, such as the last 2 long screens of Skull Man, and the last screen of Drill Man, to be completed in a single use of Flash at the top levels. A good example of this is watching the white flash. The longer it does not flash, the longer the flash duration is extended. (It is still extended even after that, but the flashing background does not show it) [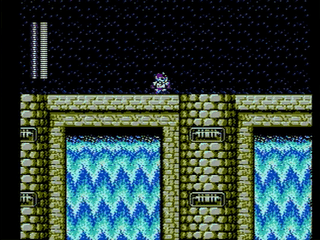](https://goodboyrush.net/uploads/images/gallery/2024-07/mm4-toad-screen1-flash-example.gif) # Boss Life Meter Speed Mega Man 4 is known for extremely long meter filling. However, damaging a boss while it's life meter is filling will cause the animation to instantly complete. There are two points in the run where this can be done. 1. Tako Trash (Wily 2 boss) 2. Wily Machine phase transition to phase 2 (Wily 3 boss) In theory this could be used in other places, but there is no opportunity to do so. # Pharaoh Shot Mechanics ### Double Hits You can hit an enemy with the charged orb over Mega Man's head, despawning the orb, and then still fire a full charged shot. Technically, you fire the same charge level the orb was when it despawned, so be aware of this against bosses (mainly Bright). This also works for firing an uncharged shot - if an enemy is above Mega Man's head, it will take the damage from the uncharged shot on a B button tap. This is potentially useful in Ring Man's stage against the floating Saturn enemies, and the Hippo Mid Boss [](https://goodboyrush.net/uploads/images/gallery/2023-11/Ke1image.png) ### Saving Ammo If you hit with the orb over Mega Man's head, it does not use ammo. You can then pause the game, and hold B while unpausing, to begin charging a new shot. The primary use for this is if you are on your last Pharaoh shot against Dr. Wily's capsule and do not want to spend the ammo. # About Zips Zips in Mega Man 4 require the player to be in invincibility frames. There are only 2 RTA viable zips in the run, [Skull Man](https://goodboyrush.net/books/mega-man-4/chapter/skull-man) and the Dust Man crusher section, and only one of them ([Skull](https://goodboyrush.net/books/mega-man-4/page/room-1-skull-man-zip)) is the optimal strat. These zips are covered in their stages. There are TAS only zips, notably the refight skip. # Stored Charge If you hold a full charge shot, and switch weapons, the charge will still be there when you switch back to buster. [](https://goodboyrush.net/uploads/images/gallery/2024-07/mm4-cossak4-storedcharge-demo.gif) # Boss Magic Pixels Being perfectly centered (X-coordinate, so height doesn't matter\*) in an 8 Robots boss room, looking either way, results in skipping some of the "weapon get" animation where Mega Man jumps to the middle of the room and "absorbs" the explosion bubbles. By skipping the jump animation, you save roughly 2 seconds per stage, so these are the free-est 16 seconds you can save in the run. If you can't get perfectly centered and always feel "off by one", you can slide and "back-cancel" to sort of reset Mega Man to get onto the correct pixel. ### Pixel Locations *Images to be collected and posted here.* ### Dive and Pharaoh In these two stages, you can additionally be in the air when the animation triggers. If done correctly, you will see the white bubble spin in the middle of the screen when Mega Man passes through the actual center (X and Y coordinate) of the screen. This saves a little more time over just being on the correct X-Coordinate. These are the only two robots this saves time on, as they are the only two Mega Man can easily access the middle of the screen. #### Right Facing Pixels As posted by t1redMonkey in Discord. [](https://goodboyrush.net/uploads/images/gallery/2026-02/mm4pixels-right.png) # Boss Kill Locations In Mega Man 4, the boss fanfare and weapon get animation do not trigger until all bubbles leave the screen. This means the location of your kill can affect your stage time by up to 2 seconds.In the case of Dive Man, this includes Mega Man's periodic Air Bubble. You can jump to make it spawn higher up, but remember a new one spawns right after it despawns at the top.
The closer you kill a robot to the center of the screen (true center at that), the more time you save. Depending on the robot master, this means you should be drawing the robot master to the center of the screen if possible. Bright, Skull, Dive, and Toad are easy to manipulate to a specific position. Ring can also be killed in the center but is a higher degree of difficulty than the other 4. High level strategies for these bosses take this kill position into consideration. Pharaoh, Drill, and Dust are jerks who will do whatever they want. In all cases, if you can kill, get the kill. Don't wait for them to move. - Pharaoh jumps around as he pleases, but stay in the middle so if he jumps to your position, it's centered. - Dust can only be in three positions. It's optimal to get him in the middle, but not worth waiting for him to go there. - Drill will do whatever he wants, but keep in mind Drill's position if he dives. Drill will come up around where Mega Man is, so keep in mind for the final hits you can make Drill pop out of the ground in the center of the room. # Pharoah Man Pharaoh Man can be visited first or second in the any% route - the only major difference is screen 1. It is visited early for both the Balloon Support Item, and the powerful Pharaoh Shot # Pharaoh - First Screens For the two routes (Pharoah First or Bright First), there are two strategies for this screen. **For either one**, note that Mega Man might sink slightly between slides if your timing is not perfect. Expect to have a small hop every 3 to 5 slides. ### Bright First This is fairly self explanatory - use Bright so enemies do not move or spawn, and slide as fast as you can. Given the Bright Slide mechanic, you could conceivably reach the end after one use of bright. Use Bright again on the second screen. Most experienced runners can make "The Jump" to Balloon without Rush Coil, but if you wanted Rush, you must wait for the Flash Stopper effect to end. Note that a no-reset strat might summon Rush Coil and then attempt the jump normally, so that a resulting Bee hit will center rush under Mega Man in the pit, propelling him back into the air. ### Pharaoh First Scorpions have 4 hit points. This requires either quick mashing (especially if the scorpion is moving fast), or a prepared full charge plus one extra shot. Jumping over the scorpions is also possible, but it is laggier than killing them. You can also slide under a scorpion. Mega Man must sink slowly into the sand 3 times (typically after sliding) to "fit" under a scorpion on the surface. ### Should You Ever NOT Get Balloon? The raw amount of time to get balloon versus reaching the checkpoint the normal way is about the same. The primary advantage to taking the lower path might be the E-Tank in the path, though Rush must be summoned to reach it. On top of that, time saved in Ring and Skull is enough (along with potential Bright Grasshoppers for experts) to get Balloon in most normal scenarios. # Pharoah - Checkpoint Screen **Note** - this is also where you respawn after collecting Balloon. ### Spike Platforms The platforms fire shots in each direction until you jump on them, then float across the spikes. This makes the section somewhat auto-scroller-like, however you can save a small amount of time by reaching platforms before they fire shots. This saves lag frames from the bullets being on screen. This is not needed at all for normal play, and does not otherwise affect the route beyond time saved, so it is safe to ignore this. As Chelney explains in his tutorials, land on the left edge of each platform. When the next platform comes into view, "Neutral Slide" to the right (that is, slide while facing right, but to not push right while sliding). Mega Man should "land" on the right edge of the platform without falling off. The moment the following platform opens its eyes, jump to it. You *should* land before it fires shots. Repeat this for each platform. (The last platform can jumped off of as soon as it reaches the right edge). The first to second platform may prove hardest depending on the bats position. ### Spike SlideThis is a WR tier strat which only saves a little time, and has a high potential of death or at least time loss.
At the last platform, it is possible to get a damage boost off the right side bullet, along Mega Man to slide on the spikes with invincibility frames. This is faster than riding the platform. # Pharoah - Last Screen Like the checkpoint screen, you want to land on platforms as soon as possible to prevent shots, however this is not always possible. Mummy heads can fly forward at 3 angles, straight ahead, or high or low at about 30 degrees. Keep this in mind as you approach to avoid getting hit. For the second mummy on the platform between pits, it might be faster to either turn left and "back-boost" through the mummy with i-frames, or slide directly into it to reduce knockback while otherwise ignoring it. # Pharoah Man Fight ### Damage Table To Pharoah| Lemons (Flash Stopper) | 1 |
| Mega Buster | 1:1:3 |
| Dust Crusher | 2 |
| Contact / Getting Bodied | 4 |
| Small Jumping Shots | |
| Full Charge Pharoah Shot |
This strat would work in the early stages, but really only applies to refights.
Pharaoh has a soft weakness to Dust Crusher. This is faster than the other two options (Buster and Bright). In refights, remember to save enough Dust for Skull. ### Magic Pixel All 8 robots in Mega Man 4 have a magic pixel. # Bright Man # Bright Man - Screen 1Whether first or second, the first section (nay, the whole first half) of Bright Man's stage is the same
Movement on this screen is fairly precise, and the timing of kills matters to avoid the lights going out at the wrong time. [](https://goodboyrush.net/uploads/images/gallery/2024-07/mm4-bright-screen1.gif) For example, the first shot is fired after one slide. This way the second enemy (a dark enemy) can be shot before the fireworks from the first green (light) enemy stop, which keeps the room lit up. Do note the last shot to kill the last enemy is important - if it misses, the enemy will likely knock Mega Man into the pit if you are moving at speed. That said, the last jump should be after sliding off the high ledge, jumping almost as soon as you land. It's a tight jump. ### Examples of Mistakes Shooting the first enemy means the lights stay out instead of coming back on when shooting the black-out enemy. [](https://goodboyrush.net/uploads/images/gallery/2024-07/mm4-bright-screen1-badshot1.gif) Not sliding off the last ledge may make the distance needed to jump too far. [](https://goodboyrush.net/uploads/images/gallery/2024-07/mm4-bright-screen1-badlastjump.gif) Not shooting before the last jump makes killing the enemy when you land difficult, likely resulting in getting tossed into the pit. [](https://goodboyrush.net/uploads/images/gallery/2024-07/mm4-bright-screen1-badlastshot.gif) # Bright Screens 2 - 4 ### Screen 2 - Grasshoppers The second screen of Bright Man features Grasshoppers. They can jump at two speeds - fast needing 2 jumps before they turn around, or slow requiring 3 jumps. On the slow pattern for the second grasshopper, you can make an early jump to the ladder platform, but it is extremely tight. ### Screen 3 - Gumball Machine **Option 1 - mash down the machine**. The kill can be faster but it is hard to do this faster than the other options. This is the fastest option. **Option 2 - Slide damage boost.** Slide into the machine and immediately slide further through to get high enough on the ladder to not get hit a second time. Option 3 - Back boost. Stand in front of the machine facing right, and after being shot, jump and climb the ladder before being hit again. ### Screen 4 - Hanging Enemies This screen is fairly self explanatory from videos. The enemies take 2 hits. It can be tight to jump and destroy them from a "Step" down. # Bright Checkpoint Screen - Grasshoppers The checkpoint screen of Bright is the infamous grasshopper screen. There are two strats through here.There is a ladder going down to a side room with an E-Tank. This is completely ignored in the speedrun.
### Normal - No BalloonsSwitch to Pharaoh Shot at this screen if you did Pharaoh First. Its primary use is killing the Totems in 3 shots instead of 8.
It is important to recognize when you are on a "slow" grasshopper vs. a "fast" grasshopper. Jump distances will be different if not unmakable, and you may want to damage boost across spikes. For the two long spike sections, look at the totems. If you have fast grasshoppers, destroy the totem as quickly as possible (8 lemons or 3 uncharged pharaoh shots). If you have slow grasshoppers, fire enough shots to almost kill them, but look for a shot to damage boost against. Look left to get boosted right, then slide across the spikes quickly to the next grasshopper. Note you are not guaranteed a shot, or may receive an unfavorable one (at the lowest height). In those cases, just destroy the totem and move on. ### Expert - BalloonsThis strat is difficult to perform without losing time. This is due to the immense amount of lag it generates. Each balloon and each moving grasshopper create lag. Combined with not destroying the totems, things can go very slow very fast.
As an extra bonus, remember sliding on a balloon against the ceiling can easily kill Mega Man.
The goal of this strategy is to use balloons instead of grasshoppers whenever possible, eliminating the RNG of grasshopper speed. It does require some damage boosts on totems. (To be added) # Bright Man - Last Long Screen The last screen has a set of swooping platforms. It is likely to be played in the dark, as it is full of the enemies that turn off the lights. ### The Enemies The first enemy is a tight shot. Angle up with Pharaoh, or use a charged shot to hit it. Other enemies can be defeated to reduce lag. - When you land on the fourth platform, fire a shot to kill the next enemy. - After the center safe platform, shoot (forward) slightly higher than Mega Man's standing position on the platform to shoot the next enemy - After the last platform, jump low under the enemy. If you have Pharaoh, angle a shop up at it purely to reduce lag. ### The Platforms You can't walk off the front edge of these platforms while they are moving (once they stop, you will fall). As such, you can walk all the way up to the front. You can stop walking to stand on the ledge safely if you wish (the platform still falls). **Going from platform 2 to 3** can be troublesome. Jumping "normally" can have a weird interaction that triggers the platform early. However, there's also a "clip" that just bumps Mega Man from the front edge of platform 2 to 3 without jumping. You may get caught on the left edge of platform 3 in this scenario (see below).**If you get caught on the left edge of any platform, unable to walk forward, slide forward and hold right. You do not need to stop the slide or jump off early (Mega Man will walk against the right edge as long as the platform is moving in the same direction. This will get you to the right edge, able to jump to the next platform.**
Just slide to the door, shooting enemies on the way. # Bright Man Boss Fight ### Damage Tables **To Bright**| Mega Buster | 1:1:3 |
| Rain Flush (Toad) | 4 |
| Pharoah Shot | 1:3 |
| Skull Barrier | 2 |
| Contact Damage | 8 |
| Shots | 4 |
**Bright only uses Flash with 16, 8, and 4 HP remaining.**
Robots have 28 Max HP. Given full charges do 3, you can avoid all of those values by hitting bright with an uncharged shot (buster or Pharaoh) once within the first 4 hits (doing a total of 10 damage, putting Bright at 18 HP). From there, only use full charge attacks, reducing Bright Man's HP down the 3x table from 18-15-12-9-6-3-0. #### The Rest - Main Stage Fight You should always enter the room (for Bright Man in his stage anyway) with a full charge ready, either buster or Pharaoh. **Bright Man Always Jumps To Start The Fight.** So don't waste your charge shot. **If you don't have Pharaoh**, remember to hit with one uncharged shot early then only use full charges after. If possible, hit with the "lemon" while Bright Man is standing on the ground, so you can charge the buster during his jumps, while Bright is out of reach. **If you DO have Pharaoh**, remember the Pharaoh Charge bug. You can hit Bright with the charge shot over Mega Man's head easily when Bright Man is jumping, by being brave and getting close to Bright Man to swing the shot into him (a technique you must use on Ring for the fastest time), or using invincibility frames from a shot or outright tanking a hit against Bright. We do not recommend tanking hits early in fights, since most Robot Masters do 8 HP of damage to Mega Man. After connecting with the shot over Mega Man's head, you can fire the full charged shot diagonally when Bright is jumping (or even down if you are jumping Bright Man's shots).Be careful with the shot over Mega Man's head - if Bright Man hits it before it is fully charged, you get the double whammy of that shot doing 1 point of damage, throwing Bright Man off the damage track to avoid getting Flashed, but you also stop charging the shot at all, and need to release it to start again.
#### Dodging Attacks It's easy to jump over Bright Man's three shots. He fires 3 in sequence, one straight ahead, one low, one high. The order of directions is random. ### Refight Differences There are two main differences for the refight in the teleporter room. #### **Rain Flush** Bright Man's true weakness is the full screen Rain Flush. It needs exact ammo, so you need all 7 to defeat Bright Man from full health. Remember if you do this that Bright Man will land on HP values he can use Flash, so you might want to hit him with a lemon first. #### **Skull Barrier** If you are following most speedrun routes, you will see Skull Barrier to open the refight. Skull is Bright Man's soft weakness, doing 2 points of damage. The Shield weapon is a little risky to hit with since you need to get close, and Bright Man can easily jump into you, or just shoot the shield to negate it. The reason to use Skull is the route calls for 2 other uses of Rain Flush, and additionally has no Pharaoh to spare. - Pharaoh is used against the Cockroach Twins, Ring Man, and Wily Capsule. A perfect run essentially has exact Pharaoh ammo - Rain Flush is used against Tako Trash for the life meter glitch, and Drill Man for the 28th point of damage. Because of this, using Skull an odd number of times (to keep Bright off of 16, 8, and 4 HP remaining) is a fast way to make up the difference, especially if you enter Bright's Capsule immediately after Dive (thus you already have Skull equipped and do not need to menu to it). Otherwise, stick to Toad. # Ring Man Ring Man is typically the 3rd stage of the any% route. # The Climb The first section of Ring Man's stage goes up. These strats largely depend on having balloon. If you do not and are still playing (presumably a no reset scenario), Bright is the ultimate backup for all things MM4. ### Screen 1 As soon as Mega Man teleports in, pause and switch to balloon. Unpause, jump towards the ladder with a balloon, and grab the ladder as close to the top of the screen as you can. [](https://goodboyrush.net/uploads/images/gallery/2024-07/fceux-synmt8t5p6.gif)You have to act fast as the first turret can shoot you out of the air and off the starting platform.
### Screen 2 Jump straight up and face right. Place a balloon in the air - not in the wall (don't despawn it). The fastest path involves getting hit by the turrets, so you will get knocked down onto the balloon after the hit, then jump through to continue on.  There are various ways you can speed up the process. They get progressively harder as we go, so you are free to pick the one you feel the most consistent with. The most obvious is to add an extra balloon to reach the top of the ladder faster [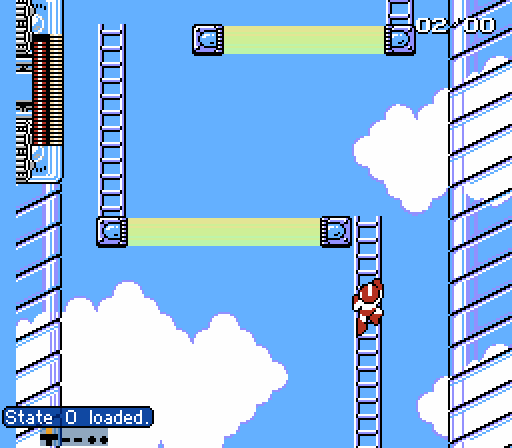](https://goodboyrush.net/uploads/images/gallery/2024-07/fceux-e9medosgwj.gif) To go even faster with the same method you can very quickly turnaround to the **left** as you are about to take damage just so you dont move backwards. This allows you to jump immediately to place the 2nd ballon and save some frames [](https://goodboyrush.net/uploads/images/gallery/2024-07/SiGfceux-wmzgehnavm.gif) The last most difficult way is to gamble for the turret to shoot you so you can damage boost while facing left very quickly to reach the right side of the screen. This specific turret has a **25% chance** to shoot. Therefore, you need to able to react very quickly in case the turret doesn't shoot. **Shot pattern** [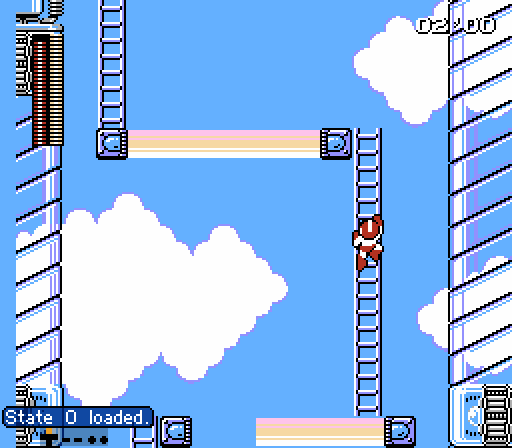](https://goodboyrush.net/uploads/images/gallery/2024-07/fceux-s7ep3sbmex.gif) **No-shot pattern** [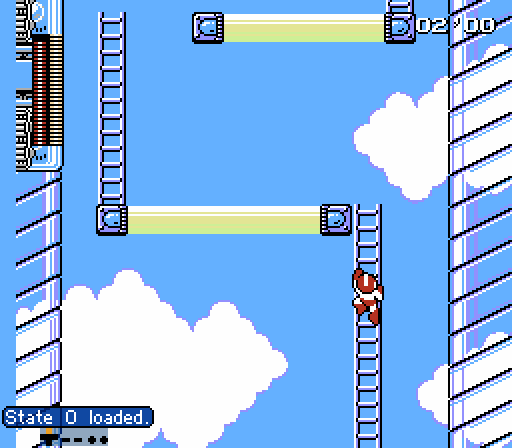](https://goodboyrush.net/uploads/images/gallery/2024-07/fceux-nuiadwae0t.gif)It's worth noting that we place this balloon slightly higher to make sure when we get the bad pattern, Mega Man gets boosted upwards, so he doesnt get any knockback to the left.
### Screen 3 - Balloon Despawn Jump You need to place a balloon high enough to jump to the platform above, and in the wall but still able to land on it for the **16 frames.** There is a bit of a rhythm to this, described in the balloon jump technique page.  Just like the previous screen, you can add an additional jump to grab the ladder quicker and save extra frames. [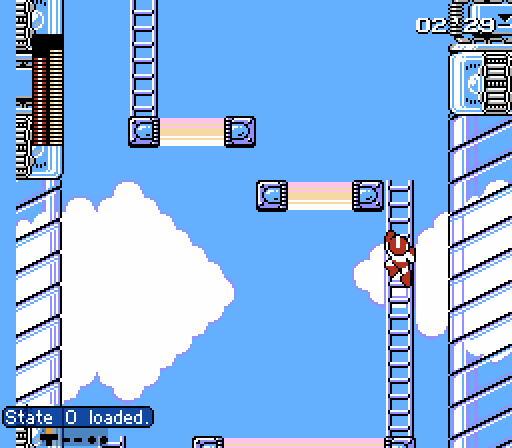](https://goodboyrush.net/uploads/images/gallery/2024-07/fceux-xjxlmvvvo4.gif) ### Screen 4 - Two Turrets Move as fast as you can to the top left under the turret. The turret can shot and the space to slip through can be tight, so unless it is actively firing you may want to just try your luck. Estimating the percentage on whenever the turrets can shot is quite difficult as depending of the pattern the will do they may call the RNG more than once. Here's a quick rundown on the RNG for the turrets| **25% chance of shooting bullets** | |
| Bullets | **Odds in %** |
| 1 | 12,5 |
| 2 | 25 |
| 3 | 75 |
Most top runners will always try to go for the gamba as the time difference isnt very massive.
### Screen 5 - Just go As you climb up the ladder menu to Pharaoh and just slide to the right. [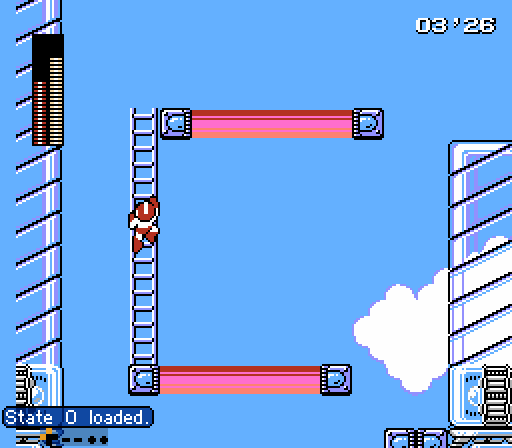](https://goodboyrush.net/uploads/images/gallery/2024-07/fceux-xjt4wgbsq6.gif)While it's possible to do the last part without the jump, it's extremely unreliable due to subpixels and the timesave is really not worth going for in RTA runs.
# Ring Man - Hippos Though the second hippo is later in the stage, the strategies are similar. ### Misc Hippo Notes The Hippo does not spawn until Mega Man is standing on the floor of the room. ### Pharaoh Skip Fire an uncharged shot at the Hippo's pillar, then slide up to the pillar. Then jump, fire another shot, then face left. Your goal is to destroy 3 chunks of the pillar - 1 with the first shot, 1 with the overhead part of the second shot (even without charging), and one with the actual second shot. Turning left knocks Mega Man back to the right, hopefully over the pillar. If Mega Man falls to the ground, just jump over the pillar. ### Balloon Skip Get under the hippo. Jump and fire one balloon, then jump into the hippo. You should land on the balloon. Proceed through the hippo. This is slightly slower than Pharaoh shot, and primarily useful as a way to conserve Pharaoh ammo. ### Pharaoh Kill The hippo can be killed with 2 full charge shots of Pharaoh plus 2 uncharged shots of pharaoh. The easiest way to do this is hold B entering the room to charge Pharaoh shot while the hippo rises. As soon as you gain control, approach the hippo and jump to connect with the overhead charge. Then position Mega Man to fire the full charge into the hippo (likely by firing diagonally). After that, jump slightly to the left of the hippo, and fire an uncharged Pharaoh shot up at it. Your goal is for both the uncharged overhead shot and the actual shot to damage the hippo, and not any missiles, destroying the hippo. This is slower than the other strategies and uses more Pharaoh ammo. However, killing the hippo means you do not take damage, so it is useful if you are low on health.Note that if you were low on health and accidently got a health drop from destroying a missile, all drops on the screen disappear when you kill the hippo, so collect drops you want first.
# Ring Screen 7 (After Hippo 1) If you haven't already, switch to Pharaoh. Note ammo usage is extremely tight for the rest of the stage.There is a large energy drop on this screen that can be collected between the platform spawning and regenerating, but you have to be quick. it is best to ignore this drop.
### Movement vs. Lag Reduction Most movement in this room looks simple - fire a Pharaoh Shot, then slide after it. There are only two Saturn-type enemies you must to defeat to go through the screen (and perhaps the final buzz saw). The rest are all for lag reduction (and thus optional for beginners, or saving ammo). Note that you want to hold B after shooting the third Saturn (the high one), so you can hold Down to release a fully charged shot at the final Buzz saw of the screen later. # Whopper There are two Whoppers in Ring Man's stage. The first MUST be destroyed to advance. The second (coincidently the final enemy in the stage before Ring Man himself) can be skipped. ### Fastest Strat - Pharaoh Boost The fastest Way of destroying the **first** Whopper is standing on the right edge of its platform, holding a Pharaoh Charge, looking right, and letting its shot damage boost you into it. Positioning is important - if you stand too far, you won't boost backwards fast or far enough to hit it. If you stand too close, the Pharaoh shot will "Dink" harmlessly off it, and you will need to use a backup. Besides the advantage of being the fastest strat, this also consumes zero Pharaoh ammo. #### Possible Backup If you lose the full charge to a dink, you can intentionally get damaged by the Whopper to fire the full charge from close range as soon as it opens. Not boosting early will have Mega Man get hit by the rings, and he may not recover fast enough to fire into the eyes. ### Normal Kill Use a full charge Pharaoh shot or 3 full charge buster shots (across 3 cycles). Stand far away and react to its shots to shoot it when it opens. ### Damage Information| Whopper's Body | 8 HP |
| Whopper's Rings | 4 HP |
Its worth noting that this strat can be done without the walk, you can slide once too if you feel uncomfortable. Though, you will probably loose time doing so.
#### Diagonal Shot strat This strat can be performed in 2 ways. Either damageless or with a damage boost. However, while the damage boost version is easier to perform, its quite unlikely that you will have enough health to take the Ring boomerang due to how much we damage boost through stuff in the stage. ##### Damageless [](https://goodboyrush.net/uploads/images/gallery/2024-07/fceux-txgbnvq0dh.gif) ##### Damage boost [](https://goodboyrush.net/uploads/images/gallery/2024-07/fceux-ke0jaqnjmj.gif)Note that the last shot is always a diagonal shot on ALL fights. The reason is very simple, while killing a boss the bubbles that appear from the explosion are causing a massive amount of lag for a short period of time, time which the pharaoh shot is still present, by shooting diagonally we despawn it quicker which reduce lag.
### Refight Notes You cannot enter the refight holding B for a charge. The opening charge is replaced by 2 uncharged Pharaoh shots but the end goal is slightly different from the stage. Just like all the other fights, we wanna kill Ring close to the teleporter, so here we can do various things. ##### Healthy fight This is mostly in case you wanna grab the health refill. [](https://goodboyrush.net/uploads/images/gallery/2024-07/fceux-s4rdpegz1p.gif) ##### Old strategy Now here the end goal is to make Ring pause right before the teleporter. Then all we gotta do is dodge the Ring and land the shot as we land to teleport immediately. [](https://goodboyrush.net/uploads/images/gallery/2024-07/fceux-d13vfluxlk.gif) ##### Optimal Kill Here, we are going to pick up the start of the diagonal shot fight. Except that we are going to go all the way to the right wall after landing that diagonal shot to fire an uncharged shot, this will allow us to charge another full shot that we are going to hold. We then slide beneath him, the full charge damage him and we have another one stored that will keep as we slide towards the teleporter. Simply release the stored shot and the fight is complete. [](https://goodboyrush.net/uploads/images/gallery/2024-07/fceux-p8z0ygonxd.gif)You can backup this fight if you miss the uncharged Pharaoh shot by doing the same ending as the old strategy!
# Dust Man Dust Man is traditionally 4th in the any% route, although it could be 3rd is you do Bright 4th. It features a very laggy room, and a crusher section. # Dust Man - First Half There are two main strategies to the first half of Dust Man's stage - Bright Man's Flash Stopper, and The Pharaoh Shot. The Pharaoh shot saves a little time if executed well, but the Flash Stopper strat is significantly easier. Both strategies dictate jumping over the first Shield Attacker enemy and bustering the first Met. You must decide on a weapon before jumping over the pit. Enemies jump out of the pits, which is one of the reasons to use a weapon. Neither strat is tightly limited by ammo/weapon energy, so you should have plenty. ### Flash Stopper #### First Screen Using Flash Stopper obviously freeze enemies, making them not jump out of pits. It also makes Shield Attackers vulnerable, so you can destroy them with 4 shots while sliding up to them. You do still have to jump over the Mets. This makes the first screen trivial, just remember to slide a lot to maintain Flash Stopper's duration. (Video by Aurel) #### Second Screen - The Lag Room Wait until the big stomper to use Flash. Slide for speed until then. Once the stomper is in the air, trigger Flash Stopper and continue. For the rising blocks, the fastest way to proceed is sliding up to the pit, and making a full jump to the right, landing on a platform as it spawns. The fastest strat is then to jump to the next spawning platform above the spikes below the ladybugs. Mind the corner of the spikes as you do this. For the last jump over the pit near the spikes, you can let the platform fully spawn for safety. If you the first pit jump, perhaps because the platforms spawned and interrupted your slide, just go to the beginning and traverse the platforms normally. From there, kill ladybugs as you are able to reduce lag, though drops will just generate more lag. Slide as you are able to maintain the Flash Stop. Get up the ladder at the end for the Eddie Checkpoint screen. ### Pharaoh Strats #### First Screen Since you are not freezing the enemies, you have to kill the pit jumpers. This requires being in the correct position to fire a down-angled shot, and slide at roughly the same time, then jump over the pit. (The position is approximately 2.5 horizontal tiles before the pit. The slide triggers the spawn at the right time to be immediately destroyed by the pharaoh shot. Keep in mind you have to dodge the Shield Attackers normally, though you can kill the Mets. #### Second Screen - The Lag Room Since the enemies are the main source of lag, the goal with Pharaoh Shot is to kill the enemies. Fire diagonally up when you reach the first purple floor tile after the stomper to get the first ladybug enemy. The other enemies should be easier to find the heights and angles to fire at. The sooner you kill them, the better. Immediately after killing the last enemy, switch to Ring (or your desired weapon for the crusher screen). This is to avoid an ammo drop refilling Pharaoh. This is only for the time loss directly related to watching the meter fill, it otherwise doesn't matter. Be mindful again that drops will generate lag, so this strat remains tricky. # Dust Man - Crusher Room The screen after Eddie and the Checkpoint is a crusher room. Strategies for this room tend to be cycle based. This room in particular is covered by Chelney's tutorial videos.**Note you should switch to the desired weapon in the checkpoint room.**
### Fastest Strat - Ring Things to keep in mind about this strat 1. Jumping when the ring flies back causes the ring to snap back to Mega Man horizontally, destroying a second row of blocks as the crusher rises and falls. 2. For the first set of blocks, wait until you see the 4th row before sliding through. If you go too fast, you will hit the Met. 3. The last shoot-slide, made just as the crusher is about to get Mega Man, is safer than it looks (but not by much). Mega Man's sliding hitbox is tiny, and Mega Man's knees work in this game (he has a few frames after the ceiling touches him before exploding, unlike Mega Man 5). [](https://goodboyrush.net/uploads/images/gallery/2024-07/dust-crusher-ring.gif) ### Buster Strats Climb the ladder with a full charge. Slide once towards the met, and when it is vulnerable release the charge shot. This will destroy a lot of blocks. You'll mostly use Lemons for the rest. ### Dust Zip There is a zip in this section, however it is slower than the optimal Ring Strat. # Dust Man - The Rest After the crusher screen, if you are not already using Ring, switch to Ring. The gumball machine takes 4 hits from Ring. While a well placed Ring will hit it 3 times instead of 2, you need to fire two anyway. The Met on the spike screen can be killed (3 shots), or "back boosted" through. Killing it is slightly faster. The big stomper should be slid under. If you have the health, try to chain your slides perfectly without stopping. Sliding under a small hop is 3 frame perfect slides. # Dust Man Boss Fight ### Damage Tables #### To Dust| Buster | 1:1:3 |
| Ring | 4 |
| Contact Damage / Getting Bodied | 8 |
| Dust Crusher | 4 |
Dust Man can decide to immediately suck again while you are still in the damage animation. Because of this, the best technique is to fire a ring boomerang through him, and collide with Dust Man before it comes back. This ensures the boomerang does damage on the way back, even if Dust Sucks again.
### Refight Notes While there are no changes to the Dust Man refight, you should watch your ammo. Ring is used for most castle bosses, as well as the Wily Machine at the end of the Teleporter Room, so make sure you keep 9 Rings for Wily Machine. The "old" refight route (2010?-2020) did Dust last specifically to "save" the extra weapon switch, as you would already be on Ring after the 8th robot entering the Machine fight. The "new" refight route does Dust first, having just collected more Ring ammo in the stage prior, so Ring is already selected entering the refight room. # Skull Man Skull is the fifth stage in the current routes. He's weak to Dust Crusher # Room 1 - Skull Man Zip At the start of the first screen, you can zip using one **Balloon** and Invicibility frames to get through the first wall, this saves around 6 seconds over doing the intended way. ### How it's done The idea is to go back to make the **Togehero** *(the Spike enemy)* spawn at the top, you then have to place a balloon when this enemy is about 2/3 in the wall and jump slide into it as fast as you can.[](https://goodboyrush.net/uploads/images/gallery/2023-11/fceux-nlwh7delrk.gif) While practicing some cues can indicate what you are doing wrong : - If you die, it means you were **too early** on the placement - If you get pushed out without zipping, it means you were **too late** on the placement ### Alternative In RTA runs, one recommended alternative is simply using bright and clear the first screen at ease. The cannons are taking 4 hits each, so to optimize movement, you wanna try to bullet slide *(shooting then immediately sliding)* as much as possible, depending on how your movement is you may need to Flash the room more than once.[](https://goodboyrush.net/uploads/images/gallery/2023-11/fceux-7i6rew2cst.gif) ### Fastest Recorded Room Time The current fastest recorded room time is 13'59 by **Chelney** *The fastest non-recorded room time is 13'56 by **LookinToad*** # Room 2 - Skeleton Joe A short room with just one Skeleton Joe at the center, despite the glaring simplicity of the room you can clear it with various strategies. ### Beginner Strategy We can just damage boost through the Skeleton and jump at the ladder[](https://goodboyrush.net/uploads/images/gallery/2023-11/fceux-x3nbltad0t.gif) ### Intermediate Strategies To speed up the room by a couple of frames we can add some balloons usage in the room, the first we can add is a [Balloon Jump](https://goodboyrush.net/books/mega-man-4/page/balloon-jumping) on the wall. [](https://goodboyrush.net/uploads/images/gallery/2023-11/fceux-8gcanephna.gif) Another small improvement that we can add is to use a balloon at the start of the room, the objective by placing the extra balloon as we jump off the ladder is that we can trigger the slide lower and a bit earlier, therefore saving a few frames.[](https://goodboyrush.net/uploads/images/gallery/2023-11/fceux-yrx9ldpwdj.gif) ### Advanced Strategies As a final add, it's possible to dodge the damage boost from the Skeleton, we are going to use one extra balloon in order to make this work. There are 2 ways this can be done ##### Safe way The safe way is not very punishing as in case of a final, this can be easily reverted to one of the previous stated strategies. [](https://goodboyrush.net/uploads/images/gallery/2023-11/fceux-txoc6icwtq.gif) ##### World record way The way is quite risky has it's very easy to place the third balloon too high and die by getting crushed. This also doesnt save a significant amount of frames so use at your own risk. [](https://goodboyrush.net/uploads/images/gallery/2023-11/fceux-goqnnyxsgw.gif) ### Fastest Recorded Room Time Fastest time is tied at 2'18 with **LookinToad** and **Chelney** **** # Room 3 - Shield Attackers # Skull Man - Second Half Most of the second half of the stage is handled by Bright Man's Flash Stopper. This mostly results in the route depending on your slide movement, to extend each Flash as much as possible. ### First Screen Notes - With Flash active, the turret enemies that usually cannot be injured from behind are vulnerable. They take 3 lemons each. - If a lemon hits them on the same frame they spawn, *it will deflect anyway! **Worse, it makes them completely invulnerable for the duration of the flash.*** So time your shots appropriately - The last jump of the screen is especially tight. Use caution. ### Second Screen / Last Long Screen Notes - Teles won't spawn during Flash, so use it sooner than later. - Skeleton Joes take 3 lemons to defeat during a flash. They will not crumble. - You might want to fire one extra lemon at the end - a Tele can spawn if Flash runs out and the lemon will make short work of it. # Skull Man Boss Fight ### Damage Tables #### To Skull| Buster | 1:1:3 |
| Dust | 4 |
| Ring | 1 |
| Contact Damage | 8 |
| Shots | 4 |
| Buster | 1:1:3 |
| Skull Barrier | 4 |
| Dust Crusher | 2 |
| Contact | |
| Torpedo Spin | |
| Dive Missiles |
Dive man will **always** open the fight by speeding across the room, regardless of the distance. This counts towards doing this attack three times in a row.
1. If you are far away from Dive, he will fire a Dive Missile (see the note above about the first attack of the fight) 2. If you are close to Dive, he will use his torpedo spin attack, moving to your position. 3. If Dive has done the same thing three times in a row, Dive will do the other thing. ### The Strat #### Fast Strat - With Skull The idea is to jump at angles so the Skull Barrier touches Dive, but Dive does not touch Mega Man. This can be risky, since the Skull Barrier cannot be launched away from Mega Man like most shield weapons. Keep in mind the Barrier will also destroy one Dive Missile when needed. You also want to draw Dive Man to the center of the room, reducing the explosion time. #### Slower Strat - Buster Keeping Dive's attack patterns in mind, you can keep your distance and pummel him with buster shots. The Dive Missiles he fires will be destroyed by the constant stream of lemons. #### Bubble Reminder This is one of two stages you can jump to reach the actual center of the screen with the magic pixel (because of the water physics). # Drill Man # Spike Turret Screen Like most screens in this stage, use Bright to proceed. However, on this screen specifically, you must use bright immediately to catch the turrets open (and vulnerable), AND before their fire shots. If you can destroy the turrets and there are no bullets, advance up the platforms destroying them, and your only worry is drops eating your slide jumps. ### Backup If There Are Bullets If you caught the turrets open but there are bullets on the screen in the way of the jumps, get onto the first platform and then back boost off the bullet. Use the iframes to pass through the top cannon. You could also use iframes to slide across the spikes to reach the ladder, but it is slower than advancing up the platforms (more ladder to climb). # Falling Rock Screen This screen is crossed using one or two Brights. Keep in mind it is a LONG screen, so you will need to be constantly sliding. It is likely you will have your Flash Stopper run out at some point as you are learning. This is a rare time it is good to predict where that is, and be ready to Flash again. ### Skull Backups If you run out of Bright on this screen, Skull barrier is an excellent alternative for dealing with the falling rocks. # Toad Man # Toad Screen 1 Use Bright and slide.Be careful of the wind on this screen. It is easy to miss some jumps between platforms when it's pushing you back.
# Escaroo Snail Midbosses Use Bright BEFORE the snail fully forms, then jump through the hitbox. On the first Escaroo, this is trivial.On the second Escaroo, if you take a death, the second time you enter the screen, there is a frame perfect soft lock if you Flash/use Bright on the first frame you have control.
[](https://goodboyrush.net/uploads/images/gallery/2024-07/mm4-toad-snail2-backboost.gif) Optimally, you can tap right to Back-boost through the escaroo hitbox. If you get knocked to the left, it is recommended to hold left to make sure you don't fall in the pit. Jumping through the screen transition saves a jump on the other side to the ledge, so you can immediately slide jump to the platform. # Toad - Last Long Screen Use Bright, and slide as much as possible.Remember you cannot jump out of a slide underwater
Shooting the last two fish prevents them from jumping out of the water when the flash ends. This is both convenient and reduces lag. If they miss, just continue. Jump directly out of the water to the last ledge if you get knocked back into the water. If you cleared Drill, Rush Jet is a backup. [](https://goodboyrush.net/uploads/images/gallery/2024-07/mm4-toad-lastscreen.gif) # Toad Man - Boss| Buster | 1:1:3 |
| Drill Bombs | 4 (full contact) |
The only difference in refights is you don't care about manipulating Toad to the room's center. Only positioning Mega Man on the teleporter to immediately beam out (assuming you don't need the health)
[](https://goodboyrush.net/uploads/images/gallery/2024-07/mm4-toad-boss-fight.gif) # Cossack 1 First castle stage of the game # Room 1 - The Slinkies This room is the first to introduce the **Slinky** enemy ([](https://goodboyrush.net/uploads/images/gallery/2023-11/mm4tomboysprite.webp)) into the game. The weakness for those enemies is the Drill Bomb but using it would be very slow as this would require extra menuing when you can deal with them somewhat easily with the Buster. You need to be careful though as they hit quite hard and they are quite resistant you need 6 shots to kill them or 2 full Buster charges. Ways to clear this room differs and the faster you wanna be the hardest this will be as this would require tight timing and good mashing.There is an E-Tank hidden in the snow at the far left of the start area. This takes only a second or two to collect, and is an excellent race/no-reset strategy.
--- ### Easy way When you first start, this room isnt very scary as you can easily jump over some slinkies while preparing a Buster charge. In this clip, we are shooting the first Slinky doing an A + B combinaison of inputs while keeping the B input afterwards to hold the charge. The idea here is to kill the slinkies that are hard to avoid, if you have a good jump mashing can deal the 3 remaining shots in one jump, although it is not recommended to go for it if your jumping isnt very consistent as there is a high chance to take damage in this case. [](https://goodboyrush.net/uploads/images/gallery/2023-11/fceux-e8zy2axqyl.gif) ### Faster ways Using the same plan and with better mashing you can speed up the room quite easily by slowing down less when killing the slinkies. [](https://goodboyrush.net/uploads/images/gallery/2023-11/fceux-colvsz5psz.gif) This one adds the one jump kill at the 3rd slinky, which is quite advanced. You need a pretty good balance with movement and mashing to do it properly. [](https://goodboyrush.net/uploads/images/gallery/2023-11/fceux-njlthlacbl.gif) ### Advanced way This is the fastest way to clear this room, the idea is to kill the 2nd slinky while preparing 2 or 3 lemon shots to kill the next slinky. It's a significantly harder strat and needs a good mashing to be done properly and save time over the previous strategies. [](https://goodboyrush.net/uploads/images/gallery/2023-11/fceux-iglhdg3upe.gif) ### Fastest recorded room time Current fastest recorded room at 14'17 by **Chelney** # Room 2 - Mono Roaders This room is very short featuring 2 Mono Roaders [](https://goodboyrush.net/uploads/images/gallery/2023-11/6s5mm4monoroadersprite.webp) Something special about this room is you need to wait otherwise you will take damage and wont be able to kill them in time. You **NEED** to have a charge shot prepared while entering this room, unless you wanna do the alternative easier strat. --- ### Strategy The plan here is quite simple, you dont need go very fast at all as you will have to bait the Top Mono Roader to go left to kill him to dodge the damage. [](https://goodboyrush.net/uploads/images/gallery/2023-11/fceux-6kl2lfyfmb.gif) Here's a quick rundown: - Kill the first mono roader. - Walk until you reach the second dot of the middle ledge and prepare a second charge shot. - Jump and grab the ladder then jump off of it - Wait that the second mono roader opens - Release the shot and go as fast as you can from here ### Different Strategy In case you wanna use Bright's weapon on the [third room](https://goodboyrush.net/books/mega-man-4/page/room-3-skeleton-joes-checkpoint-room#bkmrk-beginner-way---the-b) of this stage, you can also switch it beforehand while grabbing the ladder in the first room. Using Flash Stopper to kill the mono roaders here will save a tiny bit of time as you dont need to wait for them to open. The only hard part is to time your Bright shot in time at the start of the room. You can play it a bit safer by mashing during the transition to get an early Flash but you might loose time by getting an extra shot on the ladder. [](https://goodboyrush.net/uploads/images/gallery/2023-11/fceux-hbgtaxgkok.gif) # Room 3 - Skeleton Joes (Checkpoint Room) This room is the checkpoint room of the stage. It's one of the biggest run killers especially for new runners as it's very easy to get caught by the Up'n'Down enemies [](https://goodboyrush.net/uploads/images/gallery/2023-12/mm4upndownsprite.png) if you dont pay attention or jump properly. This room also features Skeleton Joes, which you also need to take care off. --- ### Beginner way - the Bright strategy The strategy here is simple you want to use Bright so you dont have to deal with the Up'n'Down enemies, the biggest downside is depending on where you fired your second stop you might have to wait less or longer at the end to menu. Also keep in mind that as long as you have Flash Stopper enabled you can slide off ledge without any fear, you also wanna despawn the last Skeleton Joe, this would be done in almost all strategies. Thanks to this, you can avoid damage and reach the top faster. This can be done very easily by spawning the Joe and doing a little wiggle to the left. [](https://goodboyrush.net/uploads/images/gallery/2023-11/fceux-o1bgstskv4.gif) ### Buster ways ##### Easy way Now that you have to pay attention to all enemies you will need to jump quite high to dodge the Up'n'Downs. You also need to shoot the Skeleton Joes before going on the ledge or else you will bump into them. [](https://goodboyrush.net/uploads/images/gallery/2023-11/fceux-uubab1ukh0.gif)Avoid killing the Skull Joes with Full Charge Shots to avoid drops. If you took damage on an earlier screen, a life drop will break your rhythm.
##### Common way Doing high jumps and falling straight to shoot the Joes is a bit slow. You can optimize this by adding some slides out of ledges to make yourself jump lower. You can also do a jump shoot to disable the Joes earlier so you dont have to wait. [](https://goodboyrush.net/uploads/images/gallery/2023-11/fceux-xy3mubk3cc.gif) ### Faster strat The current world record uses an alternative strategy that is a tiny bit faster on average than the common strat Instead of despawning the last Joe : - Jump to dodge the Up'n'Down - Fire one buster shot to disable the Joe - Menu to Balloon as soon as the shot hit the Joe - Place the balloon high so you can lend into it and go to the top [](https://goodboyrush.net/uploads/images/gallery/2023-11/fceux-hoj13ldo1u.gif) ### Fastest Recorded Room Time The fastest recorded time is 15'42 by **Chelney** **** # Final Climbing rooms - Cossack 1 ending The final section of this track have multiple rooms where you gotta use an extra Item to climb. The first 2 rooms are almost identical, the third one is where most of the strat variances are actually important. --- ### Climb rooms #### Beginner approach Balloons hitboxes are pretty big so you can very safely place them where you need to without doing any slides [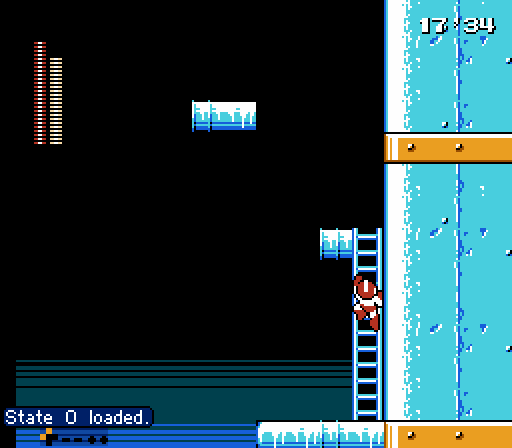](https://goodboyrush.net/uploads/images/gallery/2023-12/fceux-notaneslwf.gif) #### Fast way You can speed up those 2 rooms: - Aligning the first balloon to the ledge so you can perform a full slide - Placing a second balloon below the 2nd ledge so you can reach the ladder quicker (this is a Balloon Jump) - Adding a ledge slide after the first balloon in the second room [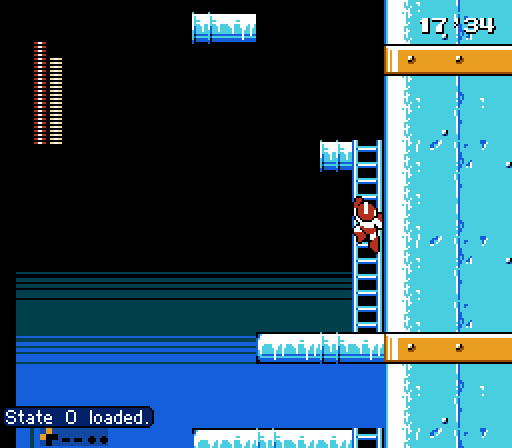](https://goodboyrush.net/uploads/images/gallery/2023-12/fceux-crl3yr1a1j.gif) Note that you dont have to add everything at once, but this is all you can do to optimize these 2 rooms. For instance, the balloon slide in the second climb room is a very small timesave, although NOT risky as most of the time you will just bonk the left side of the middle ledge. ### Triple Balloon Room This room is quite tricky, it features Ladder Presses and you have to go all the way to the left ladder while not falling. #### Safe way Before reaching the top of the ladder, press the diagonal **Up** + **Left** and then place a balloon, reach the top of the ladder, go on the balloon and place the 2 other balloons to make your way to the left ladder. Note that you will have to wait that the press open to pass. [](https://goodboyrush.net/uploads/images/gallery/2023-12/fceux-wueb6swlyk.gif) #### Safe one D-boost way To speed up, you can do one dboost on the right ladder press to skip the left ladder press you'd normally have to wait for when playing without damage by using the invicibility frames of the damage. The setup is very similiar to the safe way. You wanna place the balloons the same way but as you are jumping into the last balloon you wanna turnaround to get damage boosted to the left into the third balloon to reach the ladder afterwards, skipping the ladder press. [](https://goodboyrush.net/uploads/images/gallery/2023-12/fceux-8f1qpsqzbd.gif)Other ways to only do one damage boost somewhat safe are out there. Feel free to test what works for you in that spot.
#### Safe two D-boosts way Another safe way of doing it is to take 2 damage boosts. The safe way implies doing 2 full **A**+**B** inputs. Unlike the previous ways you wanna go to the top of the ladder immediately. Then, you perform the first **A**+**B** to place the balloon and setup yourself to be on the left side of the 1st balloon, as you land you perform the second **A**+**B** which will make you take damage but you will land on the second ballon while falling on the first balloon. Finally, you jump back on the second balloon and place the third balloon somewhat high and you slide into the ladder press while holding **Left** and **Up** so you can grab the ladder safely and move way. [](https://goodboyrush.net/uploads/images/gallery/2023-12/fceux-p5puhmlc54.gif) #### Faster two D-boosts way We can speed up that way by reducing the lag we are creating while placing the 2nd balloon. You can **A**+**B** to place the first balloon and take damage right away, you will fall right back on the first balloon, since you already are in control you can also place the second balloon a bit higher to save time. Then you place the last balloon the same as the previous shown way. [](https://goodboyrush.net/uploads/images/gallery/2023-12/fceux-a0n3bushbe.gif)Since there's only one block of the ceiling separating the ladders you actually cannot die while being crushed by the Balloon. So it's very safe to slide up there.
Taking 2 damage boosts deals a lot of damage, definitely a method to prohibit in case of low health going in here.
#### World Record way To speed up even further we can improve the movement by adding an extra slide on the first balloon. This allows us to reach the second balloon while the ladder press is still going down effectively stopping us **ON** the second balloon. Thanks to this, we have enough invicibility frames to go pass the left ladder press and therefore saving us a damage boost.This method is **VERY** hard, this requires very tight movement and uneffective movement can very easily cause big timelosses.
### Last Room The last room is a very short room that only features a single **Jumbig** in your way. #### The methods In this room, you wanna menu to Ring while climbing as your movement won't get interrupted. After the menu, you can either slide and damage boost into him [](https://goodboyrush.net/uploads/images/gallery/2023-12/fceux-yqne1gjx4e.gif) Or, to save a couple of frames you can attempt to do a backwards damage boost to get pushed very slightly to the right. [](https://goodboyrush.net/uploads/images/gallery/2023-12/fceux-ylur5udqjm.gif) #### Low health cases In case you are very low and can't afford a damage boost on that enemy, you can use an extra balloon to skip it. You need to react on the pattern as the balloon placement would be a bit different depending on how big Jumbig will jump. ##### Low pattern This method requires a quick slide and then a balloon slide. [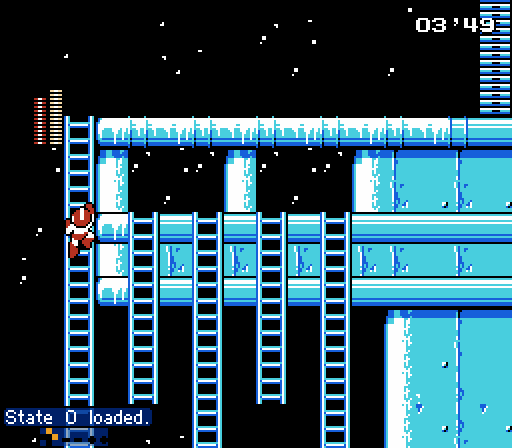](https://goodboyrush.net/uploads/images/gallery/2023-12/fceux-pfnobtxocs.gif) ##### High pattern This method require a quick slide and a very quick jump off the balloon. [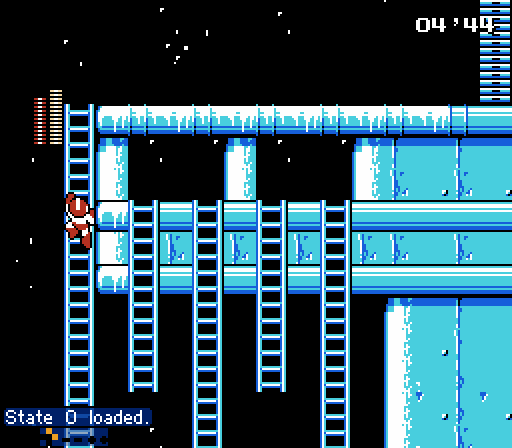](https://goodboyrush.net/uploads/images/gallery/2023-12/fceux-u7wa0kpkro.gif)Using an extra balloon or more here might need balloon ammo routing adjustments on later stages. Most likely Cossack 2. This method is also quite difficult and can require some practice to get used to.
##### Waiting stratetgy You can also wait that the jumbig jumps high to slide underneath it. [](https://goodboyrush.net/uploads/images/gallery/2023-12/fceux-x0aktbby07.gif)Note that this is highly unsafe as Jumbig can jump low the whole time, use at your own risk.
##### Ring Weakness The last resort method would be to kill him using Ring Boomerang this loose on average 3 seconds. [](https://goodboyrush.net/uploads/images/gallery/2023-12/fceux-swzezpfnn4.gif)If you manage to slide underneath him while trying to kill him, just abort the kill and go to the door.
# Mothraya - Cossack 1 boss fight **Mothraya** *(usually nicknamed **Moth**)* is the first boss you encounter in the Castle Stages [](https://goodboyrush.net/uploads/images/gallery/2023-12/mm4robotmothsprite.png) It's battle takes place on a two-layer pipe bridge. Mothraya can move left and right on the upper screen, attacking every 2 seconds with energy shots. It's main move is a spike-tipped "proboscis" with two attacks—one sudden dip to the floor and another where it slams down after a brief pause, breaking part of the bridge, which is usually a pretty favorable pattern in speedruns making it easier to get shots in despite the lag.The weakness is **Ring Boomerang** which combined with the one pixel hitbox of **Mothraya** makes the fight significantly harder than it looks to do properly
#### Strategy The plan is to keep a rhythm with the up and down movement while also baiting Mothraya's shots to go downwards as we jump upwards. [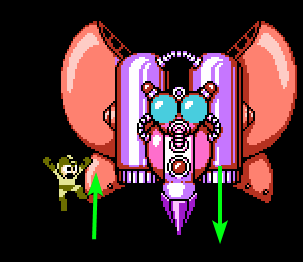](https://goodboyrush.net/uploads/images/gallery/2023-12/XQbimage.png) In order to get the shots in, we need Mothraya to go down as Mega Man goes up, that way when Mega Man reach top height, you should be aligned correctly to shot the Ring Boomerang properly. To do so, we need to walk until we reach this point from which afterwards you want to do a full jump and release the shot as you reach max height [](https://goodboyrush.net/uploads/images/gallery/2023-12/fceux-hpr0cvbhj0.png) You can use those 2 lines as a cue, here we want to jump before the first line. Afterwards, Moth will go **up** as you are falling back **down**, so then you want to wait a bit that Moth goes back down and do the same thing. Watch [Fight example](https://goodboyrush.net/books/mega-man-4/page/mothraya-cossack-1-boss-fight#bkmrk-fight-example) to have a good understanding of the timing needed.You can speed up this fight by a few frames by jumping a bit earlier in between the small left pipe and the first line
You may encounter various problems when trying to do this fight fast: - If you tend to move around a bit too much when you throw a Ring Boomerang it can cause issues when coming back to you causing you to generally loose a cycle - Trying to go to fast can make you miss in case Moth dives down quickly instead of doing it's regular movement - Going out of your rhythm can make the fight harder as you can get pushed to the left side very quickly - Dodging the bullet can be harder if you jump too fast ##### Fight example [](https://goodboyrush.net/uploads/images/gallery/2023-12/fceux-ffm0mxgqn9.gif)It's worth noting that the wings of the boss doesnt have an hitbox so you can go into them. Only the square is.
If you miss a shot don't go out of your rhythm, if you try shooting right away you will miss. Wait that Moth goes back down again just as if you didnt missed the shot
# Cossack 2 # Starting rooms When you first start Cossack 2 you are welcomed with 2 different paths available ##### Easier right path route If you dont wanna bother with difficult strategy the **right path** is probably what you want to be taking. We are going to stay on **Buster** for the few first rooms, here a quick rundown : 1. Try to grab the right ladder as high as possible on 1st screen 2. Climb the long ladder, and when you reach the ledge do a slide shot, followed by other one to kill the enemy. 3. Slide again to reach the ladder. [](https://goodboyrush.net/uploads/images/gallery/2024-04/fceux-rr8qrejl3b.gif)You can save extra frames with a well timed jump at the very end of the 2nd room with this strat
[](https://goodboyrush.net/uploads/images/gallery/2024-04/fceux-2baozvbbpt.gif)Sliding while trying to jump is significantly harder to do, and keep in mind the timesave is very minimal.
##### Balloon left path This what most runners will do as it's the fastest to approach the stage as well. As stated in the name, we need **Balloons** so in the first screen, after climbing reaching Ladder, switch to Balloons. Then you climb the left ladder and you need to precisely place 2 balloons in order to reach the top. [](https://goodboyrush.net/uploads/images/gallery/2024-04/fceux-oio2kgejt6.gif) This second room might be quite difficult especially for new runners that are not quite used to Balloons yet. You probably noticed that you need to go quite fast in order to reach the top as the top enemy is about to fall into you. Though dont let that rush your movement, as this is precisely what makes this worse. Like any balloons you need to place **BEFORE** you hit the wall, otherwise you wont be able to land on it. Which means, the first one as to be placed before you hug the right wall and the second on the left before you hug it too. You gotta make sure to place these balloons somewhat late to get good height so you land on it late. Especially the last one as you can get hit if you are too slow/too low. It's likely that any deviations are causing this strat to fail. Also make sure you are not holding "Up" - this will make you grab the ladder, and get hit. [](https://goodboyrush.net/uploads/images/gallery/2024-07/mm4-cossak2-screen2-doubleballoonfail.gif) # Spike Room Spike room is one of the scariest hallways in the game. It's very easy to miss something and die. One of the biggest run killers for beginners. This room has a **LOT** of different strategies that can be used #### Beginner strats The beginner strats are all follow-ups to the right path used early on and previously shown [here](https://goodboyrush.net/books/mega-man-4/page/starting-rooms#bkmrk-beginner-route) ##### Jet strat This strat is very comfy but the slowest of all as Rush Jet speed is quite slow. There are a few things you gotta do still. First you need to boost the 2nd spike enemy while facing left, this is important as for whatever reason Jet gets a speed boost for each reversed dboost. Make sure to avoid all refills as you SHOULDNT need them for Jet. [](https://goodboyrush.net/uploads/images/gallery/2024-04/fceux-ncpu5h7wxj.gif) ##### Balloon strats (with Buster start) Having buster at the start of this room actually gives a small advantage as the first spike enemy will be as low as possible. After killing the small skull head, you switch to Balloons and take a back boost from the spike enemy you then should have enough time to easily back boost the second one and reach the 2nd ledge. You wanna avoid using balloons here as it will trigger the refill which might kill you if you are not used to it. The rest is pretty straight forward past that point, you do wanna pick up all refills in this room while picking Balloons (not like you can dodge them anyways) [](https://goodboyrush.net/uploads/images/gallery/2024-04/fceux-qkagnr2pmy.gif)Note that most of the back boost are not necessary, they do save time and can make some sections a bit easier. So try them out if you feel comfortable enough with this room, else just boost off.
#### Intermediate strats Lets move on to the early balloon strats. There's a lot of ways, we are going to from easiest and slowest, to fastest and hardest. ##### Friendly way No tricky boost, the iframes last quite long so you can usually get a full slide before dying on the spikes. [](https://goodboyrush.net/uploads/images/gallery/2024-07/fceux-mxqpm4ragm.gif) ##### Back boosts They can vary a lot. But we can first add all the back boosts to save extra frames. [](https://goodboyrush.net/uploads/images/gallery/2024-07/fceux-toj6vz1wwz.gif) We can do an early back boost which can be the first quite tricky trick to pull off, but can gives you a few advantages. It saves a bit of time as you get pushed forward instead of backwards and thanks to this the next spiky enemy will be much lower as your iframes will ends up later. So you dont need as big of a jump off the balloon. [](https://goodboyrush.net/uploads/images/gallery/2024-07/fceux-bd6cvpurc0.gif) With everything we've seen so far, this is what we can do by optimizing the current strat. [](https://goodboyrush.net/uploads/images/gallery/2024-07/fceux-unql023dbd.gif)These strats are good enough to be played at a top level speedrun. Most 37 runners still uses this strat.
#### Advanced Strats Most advanced strats are quite tricky and only used at world record level. ##### Triple balloons One of the strats is to get rid of one of the spike damage to save time. We wanna take advantage of the balloon slides to reach the top ledge in time. [](https://goodboyrush.net/uploads/images/gallery/2024-07/fceux-7bcliqgytc.gif) ##### Ladder balloons One final add is to add ladder balloons. When placed on specifics spots on the ladder, a balloon is placed downwards. Giving you a few frames to land on it and jump off of it. Which then allows to place another one to skip the whole ladder. [](https://goodboyrush.net/uploads/images/gallery/2024-07/fceux-srdc2ewk46.gif) Adding every together gives this result. [](https://goodboyrush.net/uploads/images/gallery/2024-07/2lcqsq9faq.gif) #### Fastest Room Fastest recorded room is performed by **Chelney** with a **14'27** **** # Vertical Screens ### Screen 1 The vertical screens are where **Balloon** really shines over **Rush Jet**. There's various strategies that can be used. ##### Damageless double balloons You place the first balloon to the right of the second spiky block, then place a balloon slightly above the other spiky block to that you can slide on the balloon and safely land on the block then finish the screen  ##### Damageless single balloon A bit more tight, you jump over the enemy and align in between the 2 blocks in the center. #####  ##### Safe Damage boost Similiar to the double balloon except instead of placing an extra balloon, you take a small back dboost off the spike  ##### Damage boost (Zip way) Here you wanna place your balloon intentionally too high and further left than normal and then take damage off the spike from below, which as a result will boost you upwards.  ##### Damage boost (Fast way) Instead of dodging the enemy here we want to slide into it then very quickly place a balloon at the center and jump into the spike while having iframes The window the jump off the spike is tight on this strategy! Wouldn't recommand unless you have good consistency with it!
### Screen 2 You wanna use 2 balloons usually. One of the right and one on the left as a balloon walljump Note that if you struggle with walljump balloons you can wait for the 1st balloon to go higher and climb the ladder that way
### Rush Jet Alternatively, you can also use Jet for both screens, can be useful if you used Jet on prior screens. The first screen is simple enough with Jet. [](https://goodboyrush.net/uploads/images/gallery/2024-07/mm4-cossak2-verticalscreens-jet.gif) The second screen....is a mess as you can see. Might be best to switch back to Balloon on that screen especially if you already used Jet prior to this screen, you should have plenty of balloons to use # Checkpoint Screen This long screen involves avoiding many enemies while moving fast. The first concern with this screen is the **bat**. It can open after **1** or **3** seconds, its a **50/50**. You can clear the wall either with a regular balloon slide or balloon walljump   Using a wall balloon is always slightly faster and slightly riskier (if you get knocked down by the bat). You then wanna place balloons over the Mono Roaders instead of jumping over them, that way you can keep doing slides. ##### Full room example You can use an extra balloon to grab the health, but you may need that balloon to use the faster balloon strat in Cossack 4's shortcut room. You can always use Coil there, so it really depends on your confidence in not needing this health.
For the end of the screen, the balloon must be high enough to get over the rolly enemy, and LOW enough to get under the bat. Getting under the bat is practically an A+B input, or at least a VERY fast balloon usage. [](https://goodboyrush.net/uploads/images/gallery/2024-07/mm4-cossak2-checkpoint-end.gif)In case you are out of Balloons you can jump into the bat, jump off the spikes while in i-frames.
##### Fast Mono Roader damageboost In case you used extra balloons, you can attempt to left damage boost the last mono roader to pass the bat through i-frames without falling like the World Record does This strat is hard (mostly intended for advanced players) and is actually slower if you didnt used extra balloons in Spike Room for example.
# Minoan Room This room is quite straight forward. You wanna menu before to Dust before reaching the top of the ladder, you then have various way to kill the Minoan. ##### Wait and shoot  ##### Early timed shot Dust can deal damage twice if well timed here, killing the enemy in one go You need to be careful of a potential drop from this enemy. Not paying attention to it may result into you completely missing the ladder and loose a bit of time
# Triple Balloon Screens ### Screen After Check Point Up the ladder is where you usually switch to Dust in preparation for Square machine, using it to kill the Saturn enemy. ### Triple Balloon Screen There are two strats for the last ladder screen. The first is the easiest strat - just hold up. It is faster overall across all stages (Balloon ammo problems). The second is triple balloon, which climbs the screen fast, but uses too many balloons to be a viable time save. It still looks rad. [](https://goodboyrush.net/uploads/images/gallery/2024-07/mm4-cossak2-tripleballoon.gif) ### Final Screens If you haven't already switched to Dust, switch to dust somewhere in here. # Square MachineNote - Square Machine damage produces a very flashy screen.
### Damage Table| Buster | 1:1:3 ? |
| Dust | 4 |
Given there are no checkpoint screens, surviving this fight is important to a good intermediate time. This is a very common place to use the Cosssak 1 Free E Tank.
##### RNG Table| **Single Pattern** | |||
| **Pattern** | **Odds in %** | ||
| 1 | 12,5% | ||
| 2 | 37,5% | ||
| 3 | 50% | ||
| **Possible patterns** | |||
| **Pattern** | **Odds in %** | ||
| 1 - 1 | 1,56% | ||
| 1 - 2 | 9,38% | ||
| 1 - 3 | 12,50% | ||
| 2 - 2 | 14,06% | ||
| 2 - 3 | 37,50% | ||
| 3 - 3 | 25,00% | ||
You can reduce lag even further by standing still until the 2 spark balls on the left side despawns
While possible, you could avoid killing the Turret for the drop on top, but you don't gain any advantage doing so as you should be fine on ammo for most weapons.
#### Turret 4  ### Refill  Switch to **Ring Boomerang** and pickup this refill.If you didnt missed any Ring shots on Mothraya in Cossack 1. You can skip this drop and pick the one later in the second half, you'll save a few frames of weapon refills.
### Jumbig You'll find a jumbig at the end of this room. People usually tend to stand of the far right edge of the cloud as a visual cue for the slide.  You then need to react to when he jumps. You'll be fine if he jumps high, however low jump can be a bit tricky to time, not a huge deal if you miss it, but you'll loose a bit as you wont able to grab the ladder as early as possible ##### Low jump example  # Room 2 - Transition Room Fairly easy room, 2 saws to kill one ladder to grab.  #### Potential mistakes This room can be tricky if you try to optimize it because drops could alter your timings.  You need to be extra careful, to play it fairly safe you could walk on the first one to give yourself more time to react in case the second saw drops something that could alter your movement.You won't die if you fall off here, but its still a significant timeloss you want to avoid
# Second Half Still autoscrolling. Slide across the screen to trigger it. You want to spend as little time as possible on the floating platforms that sink when you stand on them - they generate lag. After the ring refill partway through the screen, switch to Pharaoh and hold a full charge over Mega Man's head for the rest of the stage. Use this to destroy the saturn enemies for free.  Be careful with the very last platform - if it and Mega Man are at the top row of tiles at the same time, it's possible for it to push Mega Man to the left. #### Advanced lag reductions You can kill the saturns even earlier than usual by killing them as soon as they spawn. ##### First saturn This one is really easy, go fairly early on the right side of the second platform, guaranteed optimal kill  ##### Second saturn Things start For the second saturn, you need this platform to be fully visible on screen  You then proceed to do 2 full jumps and jump ahead. If you are too early, you die. You better be late as you only take damage and most likely will be still living. [](https://goodboyrush.net/uploads/images/gallery/2025-06/mesen-ai3dlprsu4.gif) ##### Third saturn Relatively the same as the first one, but you gotta be slightly faster [](https://goodboyrush.net/uploads/images/gallery/2025-06/mesen-8tjz3gytif.gif)Damage boosting is a possibility as well for all the saturns, although you could loose some time due to refills[](https://goodboyrush.net/uploads/images/gallery/2025-06/mesen-ce7wxkqzuj.gif)
The E-Tank at the end requires Balloon. It's not required for anything and there are multiple E-Tanks in the next stage. We suggest skipping this unless it is a specific goal to collect this E-Tank. # Boss - Cockroach Twins This fight assumes holding a full charge with Pharaoh when you enter the room. ### Moonwalk Hold left when Mega Man enters, even in the air. This is for fun. ### Strategy The twins are weak to Pharaoh shot. The second spawns at the bottom of the screen when the first one is destroyed. As such, part of the strategy here is to get a "Double Hit" with one shot striking both twins, saving ammo. #### First Twin As soon as the fight start, jump and release the Pharaoh Shot at the twin, and immediately begin charging again. Make sure you land on the platform to not hit until the shot is charged. Once the shot is charged, jump under the twin to hit it with the overhead charge, then hit it again once the i-Frames run out. Quickly do this again. However, releasing this charge should finish the twin. You want to be on the left side for this shot and angle the shot down towards the lower right gate... #### Second Twin ...if you did it right, the angled shot will strike the second twin when it spawns. Other than this, simply strike the twin with Charge shots as you are able. Remember the twin is only overhead sometimes, so you will probably only get one "double hit" from one charge. Also note that the second twin unlike the first **DOES** have some RNG to it, it either will shoot a big bullet or 4 small bullets. Here are example of full complete fights with both patterns ##### 4 bullet pattern [](https://goodboyrush.net/uploads/images/gallery/2025-09/mesen-tudfl4h6jm.gif)Make sure to advance close to the ledge as you damage boost (like the example) or else your shot will get caught before its fully charged, which will loose time and ammo!
This pattern looses about 1 second due to the lag it creates over the big bullet
##### Big bullet pattern [](https://goodboyrush.net/uploads/images/gallery/2025-09/mesen-xz8tpsozn9.gif)Note that the damage on second last shot is optional but comfortable for positionning on the last shot
### Race Backups The twins take damage from Dive, Drill, and Ring. Dive could be a race bailout if the lower twin has only a few HP left and you are low or out of Pharoah. # Cossack 4 The End? # Screens 1-4 ### Screen 1 Slide off the ledges to the right. You might wanna start charging here without releasing, see [Stored Charge Mechanic](https://goodboyrush.net/link/147#bkmrk-stored-charge) for more information about itIf you need the weapon refill (presumably for Pharaoh), switch to the weapon and hold right against the wall at the screen transition. While the record route does not need this refill, it is highly recommended for beginning runners and all racers to collect this weapon drop for Pharaoh until they are comfortable now needing Pharaoh refills.
### Screen 2 If you need the weapon refill for Pharaoh, hold right during the fall to collect it. Otherwise, just fall through and slide to the right.If you dont plan on taking the E-Tank Switch to your desired weapon for the next screen - Balloon is optimal, Coil is backup/safer strat.
### Screen 3 Jump and tap right to back-boost through the cannon. Continue sliding to the left to fall down.If you want the E-Tank, just hold right during the fall. This requires an extra weapon swap to Drill to break the wall, but otherwise does not impact the route.
[](https://goodboyrush.net/uploads/images/gallery/2024-07/mm4-cossak4-screen3.gif) ### Screen 4 Slide to the right. The stomper or Jumbig, as 2 jump patterns variant. The low jump is the bad one has it will stay on screen as you damage boost through it. The high jump is the best one, as you can despawn it quicker and reduce lag by extension. There's various strats you can do for the high pattern. ##### Slide below him [](https://goodboyrush.net/uploads/images/gallery/2025-09/mesen-rueufuscrk.gif)This strat is not easy as you need fairly precise movement to not get hit, getting hit result in getting another hit from the spark ball loosing a bit of time and health
[](https://goodboyrush.net/uploads/images/gallery/2025-09/ysfmesen-refaydvctl.gif) ##### Early damage boost This strat is supposedly ever so slightly faster or tied to the one up there, but it is much easier to execute [](https://goodboyrush.net/uploads/images/gallery/2025-09/mesen-wl9trvf6wz.gif) Notice that you wanna take the damage boost before passing this line [](https://goodboyrush.net/uploads/images/gallery/2025-09/mesen-wynd5mpkft.png) Else, the spark ball will spawn early and you wont be able to make it without taking an extra damageYou can technically (in case you messed up) dodge the spark ball. Though note that wiggling can be quite laggy or slow, the difference isnt all that massive so if you are scared of health in this stage, do that.
You can't jump out of a slide in front of a ladder. Yes! you are not crazy if you think it eats your jump sometimes! Thats why if your movement is ever so slightly suboptimal, you may want to take a step before jumping.
# Screen 5 - The Shortcut There are two paths through this screen. Going to the top right is faster. ### Balloon There is a tight space to get a balloon jump and not bonk on the platform above. This is the fastest method as it does not have Rush's pause animation, but it can be tricky. There's also 2 ways to place it. ##### High placement This one involves doing a small right release to do a straight jump to place it higher. [](https://goodboyrush.net/uploads/images/gallery/2024-07/mm4-cossak4-screen5-balloon.gif) You can then proceed to menu and get rid of the wall as you start falling [](https://goodboyrush.net/uploads/images/gallery/2025-09/mesen-l2crurmkdi.gif) ##### Low placement This one can be either easier or harder depending of how you feel with the game. There's severals advantages this can give you. 1. Don't need to right release for the placement 2. Gives you near perfect height with a max height jump to land immediately on the small ledge (no need to adjust like the heigher placement) [](https://goodboyrush.net/uploads/images/gallery/2025-09/mesen-9snf72plct.gif) ### Rush Coil Simply summon as you grab, and jump on top of it to reach the top [](https://goodboyrush.net/uploads/images/gallery/2024-07/mm4-cossak4-screen5-coil.gif) You can optimize the jump by letting Rush boost you instead of jumping on him, this gives you less height so you land quicker on the top ledge. [](https://goodboyrush.net/uploads/images/gallery/2025-09/mesen-azdim9srcm.gif)This is slightly slower due to the Rush Coil animation in the menu. It is however easier to execute, since you can jump against the wall then fall straight down onto Rush.
### Next Steps Use drill to break the wall. Then fall down with Drill still equipped.There is a potential E-Tank at the bottom of the fall if you still have Drill equipped. This is a useful backup item, but not needed for WR attempts.
# Screen 7 - Slinkies Collect the E-Tank if desired, then drop down. Slide to the right, and use drill on the slinkies. Switch to buster at the end and proceed. ### 4 jump strat / Safe strat Simple, one jump, shot, jump then repeat. [](https://goodboyrush.net/uploads/images/gallery/2025-09/mesen-8wbryganio.gif) ### Faster strat This time we try to kill the slinkies in one single jump. You need to shoot fairly early or else you will get it (most likely on the 2nd one if you are too slow or too far) [](https://goodboyrush.net/uploads/images/gallery/2025-09/mesen-mgd36eatyz.gif) ### Stored Charge Mechanic You can hold a full charged buster, switch to another weapon and once you go back to Buster get an instantaneous full charge. Exactly like this example right here: [](https://goodboyrush.net/uploads/images/gallery/2024-07/mm4-cossak4-storedcharge-demo.gif) You can use the stored charge technique on the slinkies here. Technically the slinkies take two hits from the drill bombs, one from the contact and a second from the explosion. You can switch back to buster after the contact damage on the second slinky to save a small number of lag frames and start your slide ever so slightly earlier [](https://goodboyrush.net/uploads/images/gallery/2025-09/mesen-j34djp7paz.gif) You can also use it with the safe strat! [](https://goodboyrush.net/uploads/images/gallery/2024-07/mm4-cossak4-storedcharge-execution.gif) # Dr. Cossack Himself - Cossack Catcher ### Damage Table| Buster | 1:1:3 |
| Dust Crusher | 2 |
| Wire | 1 |
You may sometimes miss the jump of the slide on the last one. That usually happen when your movement isn't so good on your first slide or you may have jumped too high off the ladder.
### Room 2 - Single Stair Room Another fairly easy room, this room contains 2 mets. To take care of the first one, you simply **A + B** and **jump** off the ladder. For the second one, just **A then B** *(not A + B)* or else the shot will be too low. [](https://goodboyrush.net/uploads/images/gallery/2025-06/mesen-0b3rfqgipg.gif) If you want to optimize a bit more you can add extra slides to speed up the room. [](https://goodboyrush.net/uploads/images/gallery/2025-06/mesen-clol6ntyi2.gif)The second slide is actually harder to save time with as you may jump slide a bit too far. Making the ladder grab a bit slower.
### Room 3 - Double Stair Room This is the first tight room of the stage that can be tough to do without taking damage or just clean in general. There's several things to pay attention in it. #### First 2 Mets Like the previous room, the first Met can get taken care off with a simple **A + B** as you **jump off** the ladder The second met is a **THREE HP** met. There's various ways to handle it. ##### Just walk If your mash might be inconsistent or a bit on the slow side. You can jump spam A and B as you walk towards the met [](https://goodboyrush.net/uploads/images/gallery/2025-06/mesen-vegeejeuaa.gif)Any extra shot will create extra lag in this room
##### Back damage boost strat A bit harder but you can use the forward bullet to take a back boost off of it [](https://goodboyrush.net/uploads/images/gallery/2025-06/mesen-odhsbzumcz.gif) You can optimize this strat by making it to the stair the Met is standing on [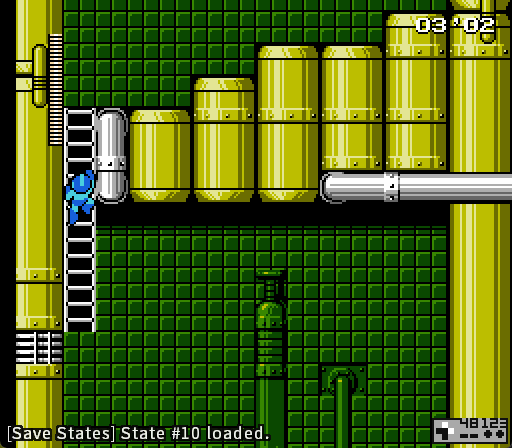](https://goodboyrush.net/uploads/images/gallery/2025-06/mesen-vj6uwfeoka.gif) ##### Slide + Mash The optimal strat, you slide towards the met but you jump out off it to get 3 shots very rapidly [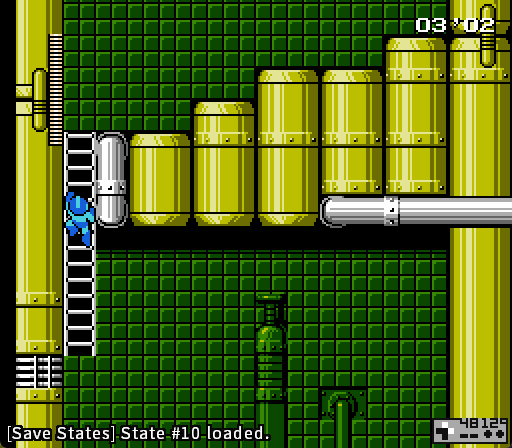](https://goodboyrush.net/uploads/images/gallery/2025-06/mesen-ciezbhseri.gif) #### Last 2 Mets You need to pay very close attention to where this met will jump. [](https://goodboyrush.net/uploads/images/gallery/2025-06/chrome-klt6ru8qrf.png) There's 2 differents jump height the met can do, a low or a high jump. As you execute you may not have the time to check whatever jump the met is doing but you can easily see it depending of where that Met lands ##### Fast Pattern - Low jump [](https://goodboyrush.net/uploads/images/gallery/2025-06/mesen-qvt7aida0k.png) If the Met lands here, it means it will open a bit quicker, meaning you need get ready to kill it as soon as you get through the first 2 mets. [](https://goodboyrush.net/uploads/images/gallery/2025-06/mesen-hlrxpfqgoa.gif)The small slide is optional, can make it harder or easier depending of how you play. You can cut it out if you dont like it [](https://goodboyrush.net/uploads/images/gallery/2025-06/mesen-yxiscvm6zi.gif)
##### Slow Pattern - High jump  On the slow pattern the Met will delay its opening a bit, meaning you need to slow yourself down. You can do that by walking very close to the Met to the point of nearly bonking the stair he's on, and then a regular **A + B** [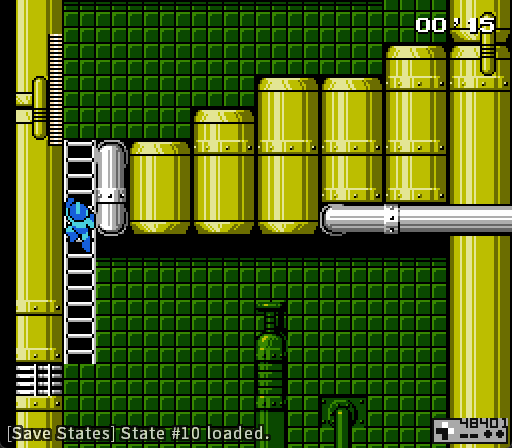](https://goodboyrush.net/uploads/images/gallery/2025-06/mesen-pgbplasnif.gif) ##### Reactions to mistakes Since these Mets are on a timer the moment you are in their range, you need to be careful in case you miss the 2nd Met (most common mistake) In that case, you need to prepare yourself to hit that Met **earlier** than usual. Here's a mistake case scenario for both patterns [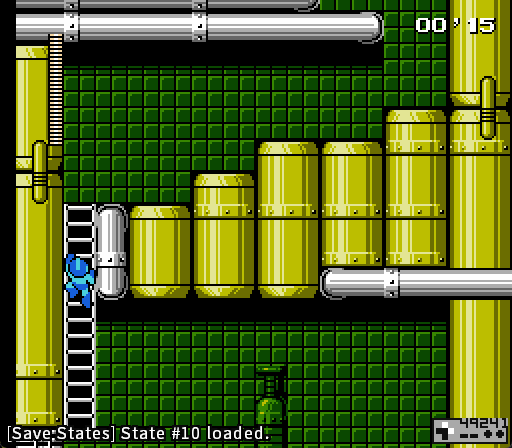](https://goodboyrush.net/uploads/images/gallery/2025-06/mesen-zgpo5a6dci.gif) [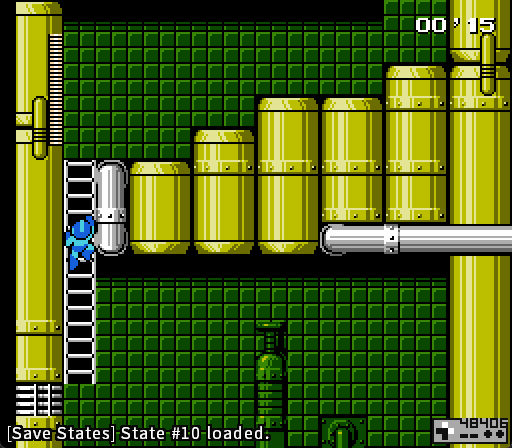](https://goodboyrush.net/uploads/images/gallery/2025-06/mesen-bxxbzr2lzp.gif) #### Full Room Examples + Ladder grab You dont wanna kill the last Met, its a waste of time. Jump to grab the ladder as you dodge the last Met's shot [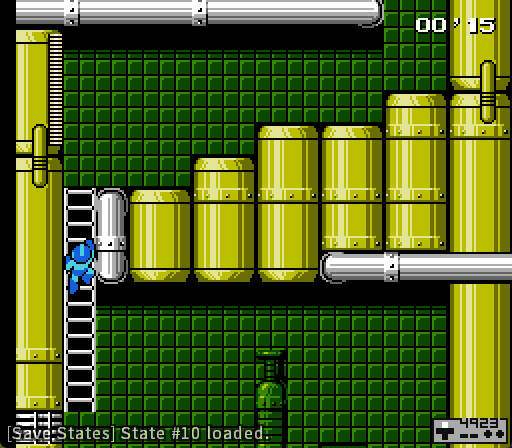](https://goodboyrush.net/uploads/images/gallery/2025-06/mesen-yaj4nchaix.gif) You can speed it up by sliding. [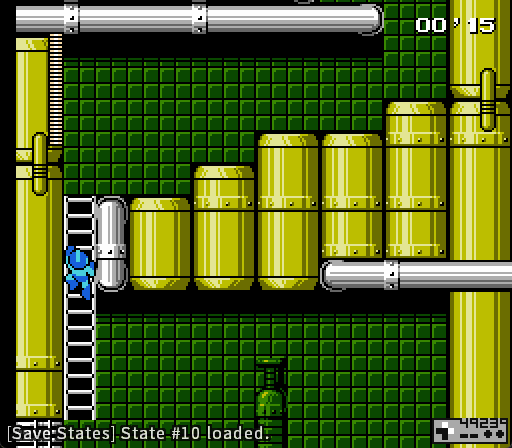](https://goodboyrush.net/uploads/images/gallery/2025-06/mesen-nh8lijyo7v.gif)The higher you jump, the slower you'll be, try a low jump. The reason being that unlike some Mega Man games, you are unable to grab ladder offscreen
# Screen 4 - Long Met Screen One of the most difficult screens in the game to execute properly. We will go through various ways to clear this screen without taking any damage. For all the strats the beginning will be the exact same. 3 regular slides, bullet slide, then slide. This is after this that the variances are starting ### First half #### Safe way - Jump shot then jump land The timing to get the top Mets in one jump is really tight. You can easily clear it by jumping earlier [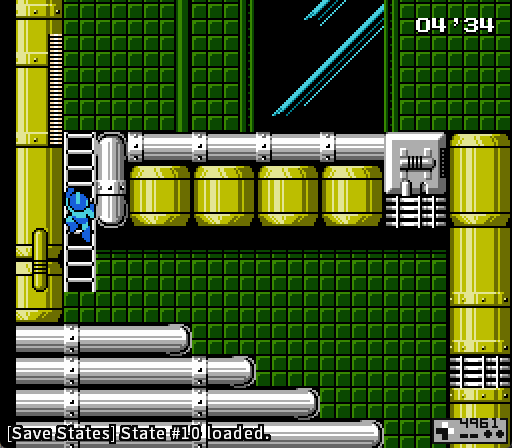](https://goodboyrush.net/uploads/images/gallery/2025-06/mesen-a0subzvwj4.gif)If possible you wanna avoid bonking the wall for a minimal timeloss like shown in the GIF
#### Hard way - Jump shot landing You need to shoot relatively early but you also need to do jump quite late to be able to land on the top ledge, making the window really tight. To be able to do this fairly consistently, you actually need to **delay** the slide out of the tunnel [](https://goodboyrush.net/uploads/images/gallery/2025-06/mesen-1mwm5b5ckz.png) You can **walk then slide** [](https://goodboyrush.net/uploads/images/gallery/2025-06/mesen-3qnuuuha3t.gif) You can **jump then slide** [](https://goodboyrush.net/uploads/images/gallery/2025-06/mesen-kro5zvj8rt.gif)Various other stuff probably works here, feel free to experiment on whatever you like better or simply works for you
Don't feel discouraged if you miss this, it is quite tight especially for new runners
### Second Half You can easily take care of the following Met with an **A + B.** Start charging right after to prepare for the upcoming next Met [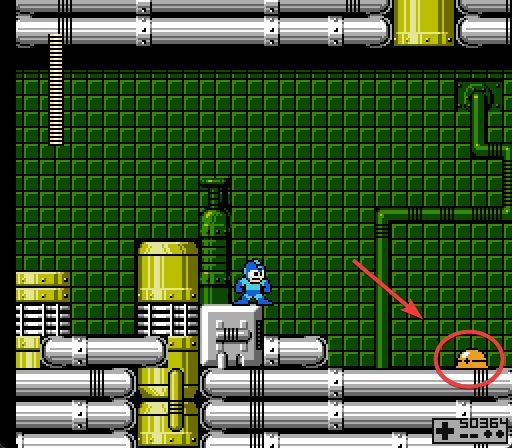](https://goodboyrush.net/uploads/images/gallery/2025-06/mesen-ozvbdd7cvr.png) ##### Regular way As you kill the 2nd Met, prepare a charge, walk until reach the last stair then slide and release as you are on the same Y position as the Met. [](https://goodboyrush.net/uploads/images/gallery/2025-06/mesen-g4zj7qf44l.gif) ##### Harder way - World Record way As you kill the 1st Met, you can very quickly fire a second shot, that way you can start charging ever so slightly earlier allowing you to cut the walk and add the slides that were missing [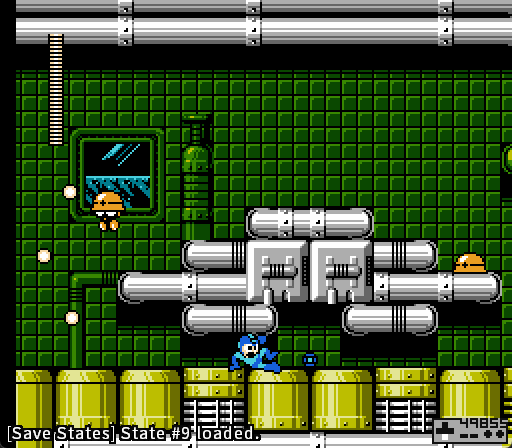](https://goodboyrush.net/uploads/images/gallery/2025-06/mesen-oe5qdv5tax.gif) ### Final part The last part follows the same type of jump shoot timing as the first jump shot you have to do. You can apply the same method. Either double jump to kill the Met or single jump [](https://goodboyrush.net/uploads/images/gallery/2025-06/mesen-zsgha8yuxe.gif) To be able to jump shot in one go, you can make it "easier" with a very small jump slide on the edge, right here [](https://goodboyrush.net/uploads/images/gallery/2025-06/chrome-bqlivciamj.png) That way you'll land quicker on the next ledge making it jump in one a lot more doable. [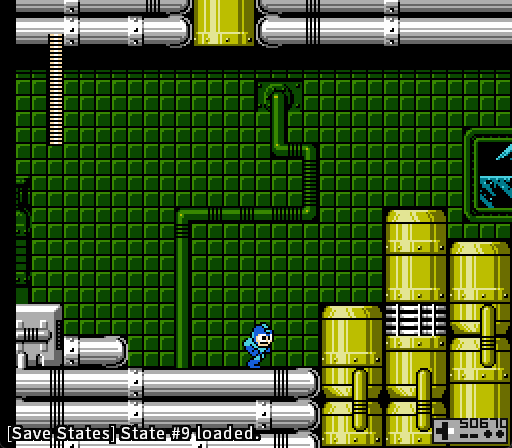](https://goodboyrush.net/uploads/images/gallery/2025-06/mesen-gk762bmn8o.gif) This slide isnt required, you can still make it without it, but the window will be ever so slightly worse which can make the difference in consistency [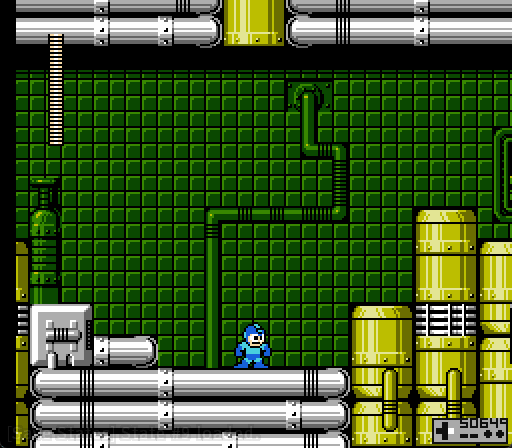](https://goodboyrush.net/uploads/images/gallery/2025-06/mesen-osamz3tt0d.gif) ### Full room examples Now that you know all the possible shenanigans you can perform, here's a few examples of relatively ##### Safe strats - beginner friendly [](https://goodboyrush.net/uploads/images/gallery/2025-06/mesen-kkwnyenarb.gif) ##### Intermediate/Advanced strats [](https://goodboyrush.net/uploads/images/gallery/2025-06/mesen-h2jp6vu4p4.gif)Notice that you need to slightly deviate from the left wall to avoid the bullets, unlike the safe strat
##### WR strats This is essentially the same, except with the extra met shot added in [](https://goodboyrush.net/uploads/images/gallery/2025-06/mesen-pgwk0ixvhp.gif) ##### Fastest Room Time Executed in **10'45** by **Chelney** # Screen 6 - Underwater Screen Take advantage of the walls and slide all the way up to them. Jump and shoot the Mets as needed. Be careful with the jumps and proceed as quickly as you can.As a reminder, you cannot jump out of slides underwater in Mega Man 4
### Safe way - Damage boosting Here we will stay on Buster. But this can be scary to move properly in the water especially near the end. Scared? Well time to do some damage boosting! [](https://goodboyrush.net/uploads/images/gallery/2025-06/mesen-p84cskvjcg.gif)The first damage NEEDS to be a back damage boost, else you wont have enough iframes to go through the spike safely
### Damageless strat We are going to cut some of the unnecessary damageboost to clean the room up, but without doing some risky stuff [](https://goodboyrush.net/uploads/images/gallery/2025-06/mesen-8wnv9ixcdp.gif) ### Optimal strat If we wanna optimize, you can kill the Met and jump all the way to the top ledge in one jump [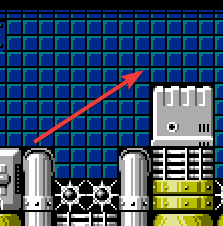](https://goodboyrush.net/uploads/images/gallery/2025-06/chrome-pgpsjq19hs.png) While the reason might seem strange, you do actually save time by doing this as you avoid bonking the wall ### Dangers of this room When you are barely not full health, you may encounter what we call **Death Drops** if you speedran Mega Man 3, you might already know what are we leading to. Met dont deal a lot of damage, so its very likely you might have gotten one hit by a Met in the previous rooms. In other words, if you are not ready, this Met is very likely to kill you [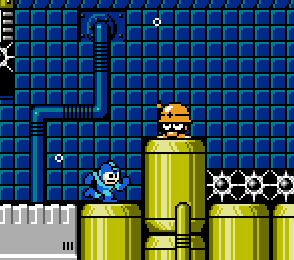](https://goodboyrush.net/uploads/images/gallery/2025-06/chrome-t8fqon5ev2.png) You need to be very careful, to not jump to far right as a drop can kill you A input very easily #### What About Rush Marine? Besides the obvious talking points of Rush being slower than sliding, and switching to rush being an extra animation, Rush Marine simply does not fit through the spike gaps. While potentially useful if you are uncomfortable jumping through spikes underwater, Rush Marine should be avoided. [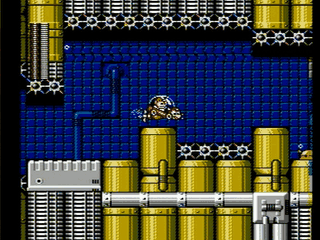](https://goodboyrush.net/uploads/images/gallery/2024-07/mm4-wily1-screen6-rmarine.gif) ### Spot to menu For the next following rooms, we actually will need **Rush Jet**. The best spot to menu is right here, as you fall off the ledgeAs a reminder - if you pause on the ladder, mega man will release the ladder when you unpause the game. DO NOT hold left out of a pause here, since the spikes are next to you.
[](https://goodboyrush.net/uploads/images/gallery/2025-06/chrome-shi3h7gtsk.png) ### Full room example [](https://goodboyrush.net/uploads/images/gallery/2025-06/mesen-bkxqzkqkmv.gif) #### World Record stuff Since you cant jump out of a slide underwater, you can perform some slide cancels, like in Dive. Although, very hard to save time with them. Here's an example with the fastest time of the room : **13'06** by **Chelney** **** # Screen 7-9 - Ending Screens ### Screen 7 - Yoku Block Room 1 Relatively simple screen, use Rush Jet and grab the ladder, various ways ##### Top Ladder Jump of the front left of Jet then, near the ladder, jump [](https://goodboyrush.net/uploads/images/gallery/2025-06/mesen-poz98lszt3.gif) You can be a bit more fancy and try to skip the whole **Ladder** [](https://goodboyrush.net/uploads/images/gallery/2025-06/mesen-rlebthbh7j.gif) ##### Drop off the ladder As you are about to the same level as the water place Jet, drop off the ladder and land on it, If you are too far right, dont hesistate to do some small hops to push yourself to the left [](https://goodboyrush.net/uploads/images/gallery/2025-06/mesen-frcitpphwx.gif) ##### Slide off strat As you are about to the same level as the water, drop off the ladder, dodge the saw and slide, then place jump and place Jet [](https://goodboyrush.net/uploads/images/gallery/2025-06/mesen-xaujvz5rxl.gif)Most strats are fairly equal, the 2 last ones are frames faster compared to the first strat but slightly harder.
### Screen 8 - Yoku Block Room 2 ##### Safe/Beginner strat Go on top of the ladder, spawn Rush Jet, jump on it and try to land on the right side of it (it will make your top jump easier) then try going up while holding left to slow Jet down a bit [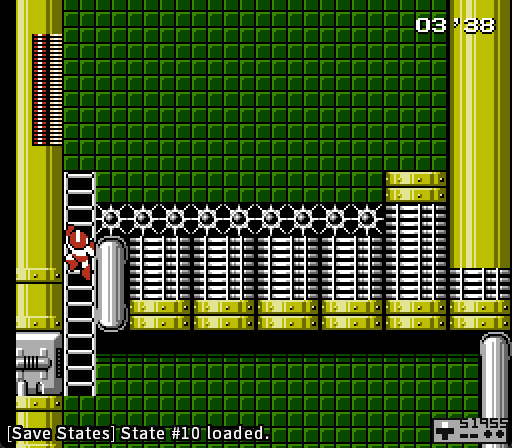](https://goodboyrush.net/uploads/images/gallery/2025-06/mesen-nndnsqvnb7.gif) ##### Optimal strat You wanna try to spawn Rush Jet as early as possible whenever you gain control of Mega Man, that way as you go up and jump off the ladder, Rush Jet will be in a perfect place for you to land on it [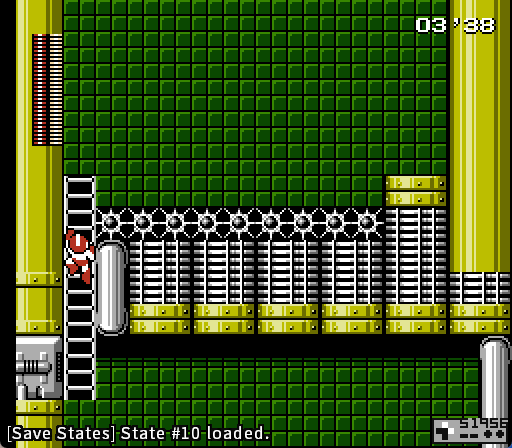](https://goodboyrush.net/uploads/images/gallery/2025-06/mesen-js8knyrrmh.gif)Grabbing the ladder offscreen will result off a relatively slow grab. Make sure you do a fairly small jump to avoid it](https://goodboyrush.net/uploads/images/gallery/2025-06/alYmesen-gasiarkjuu.gif)
### Screen 9 - Last Screen Straight forward screen that can be optimized with careful planning of your shots. ##### Safe way If you feel uncomfortable with killing the Mets, you can jump over them without taking damage [](https://goodboyrush.net/uploads/images/gallery/2025-06/mesen-nmw0zzcmvs.gif) ##### Hard way 2 slides, 2 bullet slides. One to spawn Rush the other for the free shot then 2 shots again. Then, bullet side to spawn Rush and 3 shots [](https://goodboyrush.net/uploads/images/gallery/2025-06/mesen-3hwhhbppzj.gif) # Met Daddy Fight Met Daddy is the first boss in Dr. Wily's castle. It attacks by stomping, jumping, and causing Mets to fall from the ceiling when it lands. It does hide under it's helmet like regular Mets and is mainly weak to the **Ring Boomerang**. Weakness that you want to equip **BEFORE** entering the boss, so basically in the corridor room. ##### Safe strat Before entering the boss, make a full jump in the door instead of sliding in. That way you can land a lot further right than normal, which makes getting more shots in easier. [](https://goodboyrush.net/uploads/images/gallery/2025-06/mesen-g1hyqczylq.gif)This loose about 40 frames as it delays the boss cutscene to start
#### Main strategy The main strategy is to avoid body damage by taking advantage of the small Mets. You wanna take damage boost of the small ones to slide through the boss. [](https://goodboyrush.net/uploads/images/gallery/2025-06/mesen-kwq4s5few8.gif) This boss has quite the RNG (check [here](https://goodboyrush.net/books/mega-man-4/page/met-daddy-fight#bkmrk-met-daddy%27s-rng) for more info on it) but the main important one for now is the delay he stays still before jumping. At the start of each cycle **you can safely deal 2 shots.** You then need to react to what he does (Short or Long Pattern?) and kinda prepare a slide to the direction he's going to jump, in case he actually jumps short. If not, you go back to deal the 3rd hit and go away In the case of a long pattern, you'll have **3 SHOTS** before he jumps towards you. Make sure to do an A+B jump as he's touching the ground that way you avoid getting frozen. ##### Long Pattern [](https://goodboyrush.net/uploads/images/gallery/2025-06/mesen-j5vsbls9zn.gif) In this case, if executed properly should be able to get **6 SHOTS** in. ##### Short Pattern [](https://goodboyrush.net/uploads/images/gallery/2025-06/mesen-dxgo76w1uy.gif) In this case, if executed properly should be able to get **5 SHOTS** in. #### How to get a guaranteed 3 cycle fight Getting a 3 cycle can be up to really easy to really hard depending of the pattern One major key to make this possible is to always send Met Daddy to the extremes part of the room, that way he jumps **higher** giving you slightly more room to get extra shots in. [](https://goodboyrush.net/uploads/images/gallery/2025-06/chrome-wi1lxoxoxp.png)Keep in mind, Ring Boomerang has a MAJOR range, so you can stay relatively far away from Met Daddy
Making Met Daddy do a small jump (happens when you are too close to him), almost kills the chance for an extra shot. Meaning that instead of getting 5 or 6 hit in one cycle, you may get 4 or 5, which can cause an entire extra cycle
#### Example fights - Optimal strat start From easiest to hardest fights ##### 6 - 6 - 2 (Long Pattern - Long Pattern) [](https://goodboyrush.net/uploads/images/gallery/2025-06/mesen-uljsnknkhr.gif) ##### 5 - 6 - 3 (Short Pattern - Long Pattern) [](https://goodboyrush.net/uploads/images/gallery/2025-06/mesen-hcvn2wnlnb.gif) ##### 5 - 5 - 4 (Short Pattern - Short Pattern) [](https://goodboyrush.net/uploads/images/gallery/2025-06/mesen-qulwg2y8n0.gif)On the last cycle, making him jump high is not very useful. So we can stay close to him because we know we will kill him anyways, sometimes even before he can jump again
### Met Daddy's RNG| **Delay jump pattern** | |||
| 0x3C (60 frames) | 50% | ||
| 0x78 (120 frames) | 50% | ||
| **Met falling pattern** | |||
| Scattered | 25% | ||
| Close | 50% | ||
| Very Close | 25% | ||
| **Time Spent in the ground** | |||
| 0xB4 (180 frames) | 50,0% | ||
| 0xF0 (240 frames) | 50,0% | ||
There is a free e-tank at the stage start if desired
### Screen 1 Your route to this point needs either just Ring ammo and possibly Dust ammo. Keep in mind there is a spare ammo drop on the top right if needed, but most runners should only need Ring ammo on the bottom left. If needed, Ring and Dust Ammo is collected more in a few screens. The current WR route does not collect extra dust ammo here at all. ### Screen 2 Take the damage boost and proceed. Fall against the left wall to collect ammo on screen 3, but don't try to collect the small health drops. (They don't impact the route, they just lose time and shouldn't be necessary) ### Screen 3 Hold left as you fall in to collect some small drops. - New route only gets enough Ring to finish and stays on Ring. - Old route switche sto Dust for some more dust ammo and stays on dust. ### Screen 4 If you have Dust out, kill the enemies If not, dodge them ### Screen 5 & 6 Slide to the gate. Get the health if desired. Remember it's hard to jump under a ladder out of a slide. # MM4 Refight Route Both refight routes follow some basic principles - Reduce weapon swaps as much as possible (less pauses) - Make use of soft weaknesses - In stages, it is preferred to kill bosses in the middle of the room to reduce explosion lag. In refights, it is preferred to position Mega Man on the teleport exit to leave the room as soon as possible - Remember collecting health is not required to exit, so if you WANT the health, get away from the exit before finishing the boss. ### New Route 1. Enter the teleporter room with Ring equipped from collecting ammo earlier in the stage 2. Dust first since Ring is equipped 3. ??? 4. Profit ### Old Route [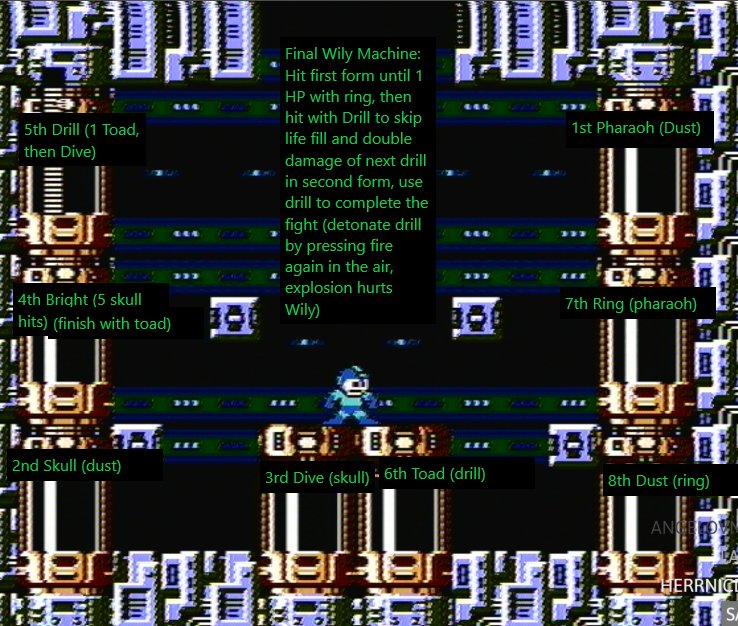](https://goodboyrush.net/uploads/images/gallery/2025-05/mm4-refights.png) 1. Enter the teleporter room with Dust equipped from collecting ammo 2. Pharaoh First - Pharaoh takes 2 damage from Dust 3. Skull second - You can go over the middle two teleporters, but it's slightly faster to slide through them. This is a somewhat tight slide to avoid getting teleported - start from almost inside the glass 4. Switch to Skull, Dive third 5. Bright Fourth - Skull does 2 damage to Bright - As earlier, your goal is to avoid getting flashed. Hit Bright with either 3 or 5 Flashes - Switch to Toad to finish the fight. 6. If you have more Toad, keep it equipped and go to Drill - Using one Toad does 1 damage, as Dive missiles leave Drill with 1 health left after 9 shots - Switch to Dive for the rest of the fight 7. Switch to Drill, fight Toad 8. Switch to Pharaoh, fight Ring - You cannot enter this fight with a charge overhead, so adjust accordingly. Typically this means the opening charge shot is a normal shot, and you need one extra uncharged pharaoh shot at the end 9. Switch to Ring, fight Dust 10. Keep Ring equipped, advance to Wily Machine. 11. # MM4 Wily Machine Ring and Drill ### Phase 1 Use Ring and enjoy that wonderful dink sound. Ring does 3 damage, leaving the machine with 1 HP left. At this point, switch to drill to finish the machine with a high shot. This will do damage to phase 2, making the life meter fill instantly. ### Phase 2 Use Drill, but remember Drill itself will not connect. You need to detonate the drill bombs with B just in front of the weak spot to do damage. It takes 7 drills to defeat. (Keep in mind the last drill from phase 1 should count towards this. If it did connect, the life meter will fill to full, and the next drill will appear to do 8 damage.) ### The Soft Lock After the Machine explodes, it is possible to kill Wily's escape capsule with Toad's Rain Flush. This soft locks the game. # Wily 4 Final Stage # Corridor The approach corridor is full of worm enemies, Most of them are spaced two slides apart, except the third one which is a jerk.Dr. Wily can only be damaged by Pharaoh (good damage) and Ring (1 HP per shot), so farming these worms for ammo may be your only way to finish the game. A WR attempt should not need any additional ammo here, but in a race scenario, a bad Ring refight or some other scenario may result in needing ammo.
# Wily Himself ### Damage Table| Pharaoh | Charged: 6 |
| Ring | 1 |
| The Rest | 0 |