Cloud Man
Watch your step!
- Cloud Man - Screen 1
- Cloud Man - Screen 2
- Cloud - Screen 3 Fast Checkpoint
- Cloud Screen 4 - Invisible Platforms
- Cloud Man - Screens 5 and 6
- Cloud Man - Final Screen 7
- Boss - Cloud Man
Cloud Man - Screen 1
Slide to the right and start charging. Use short hops to start sliding again quickly, and get past the stream of 4 purple birds before they can dive to you.
Slide as far as you can off the ledges to get over the up/down enemies in the pits, otherwise the jumps are spooky. For the second jump, you can full jump and shoot the birds rather than trying to get under them. Shoot the lead bird to stop the rest from diving.
On the last jump to the platform, you can again either fire at the bird's height to tag the lead bird and stop them from divind, or try to out-slide them.
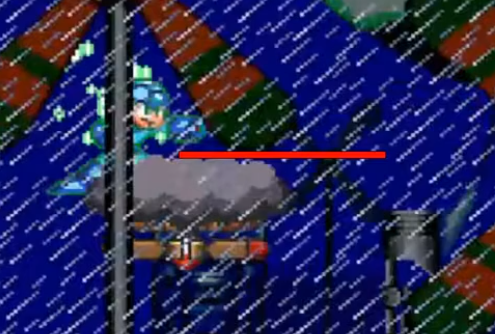
The the rain generator at the end, slide close to the end of the platform and back cancel - you don't need to be ON THE EDGE you just need to be close enough to slide off. While the white robot is high in its up/down cycle, slide off the edge while holding right. You should make it to the end.
Remember to jump and grab the ladders as high as you can.
Cloud Man - Screen 2
Charge the buster. Slide jump going right off the ladder's platform. Full jump then hesitate before sliding to get under the robot.
Full jump off the edge of THAT platform, then release the charge shot at the birds. Remember to continue slide jumping as late as possible to get past the up/downs.
For the drop down, you will likely get hit by the crawling suzy. You can try to back boost off it to gain a little extra speed to reach the end of the platform. Otherwise you can just eat the extra hit.
Otherwise slide jump to the end. The last jump to the right though a normal jump is all you need.
Definitely jump up high to get extra height on the next screen for its tight timing.
Cloud - Screen 3 Fast Checkpoint
This screen requires tight movement. If you can't go fast enough, taking a death is very likely. Use caution as needed for your skill level in a no reset situation.
Charge the buster, slide towards the end of the platform. Use a short hop before the end to defeat the floating turret, then full jump onto the cloud. Start charging again.
Get across the next platform to the cloud, destroying the next enemy. Start charging again and wait on the left of the second cloud platform.
Fast Clouds
Screenshot credit to Phantomire's Tutorial
When the cloud gets under the fan blade, slide jump off the cloud to the next one.
Release the charge to kill th enext enemy as soon as you can. You need to just about immediately slide through the last cloud and jump to the final platform.
Cloud Screen 4 - Invisible Platforms
Opening
If you made it snow in the stage with freeze cracker, you can see these platforms covered in snow. This is obviously not possible in Cloud first but might be useful for learning the platform layout or in a hundo run with Cloud third.
Shoot as you enter the screen to defeat the first enemy. Jump up the first step and medium jump to the next platform.
Jump and shoot twice to destroy the bird egg. Slide over the two tile gap while holding right - you'll make it.
Jump up the stairs, charge a shot, and slide off the ledge down to the next platform. Jump up the next steps of stairs, then slide to the next platform...
Minor Hundo Route Divergence
The Rush Power Adapter letter plate is up a ladder from this screen, above the next lower platform. See Hundo notes for the fastest way to acquire it, but it likely involves Rush.
Any%
Charge Shot the eff enemy and slide-jump to the next screen.
Cloud Man - Screens 5 and 6
Screen 5
Screen 5 is a Sniper Joe and ladders. have a charge shot ready coming onto the screen, jump up to blast him when you can, and continue. (Optionally damage boost through if you have high health).
Screen 6
Shoot the enemy in specifically the head from the ladder Slide right, and jump over the next enemy.
Hundo Divergence
Use Rush to reach the ladder above this second enemy. Proto Man awaits. This is required to acquire the Proto Shield later.
Cloud Man - Final Screen 7
Screen Start
Come on to the screen with a full charge. Jump up the first two ledges, but release the shot just before landing (you need some elevation). Immediately slide to spawn the bird and destroy its egg.
Get raedy to kill the next bird that spawns at the next platform, then jump to it. You may need to jump again to destroy the bird. Then slide and jump to the next platform.
Fan Enemies
The fan enemies either pull you to them or push you away.
If they push, blast them. If they pull, you can jump at them and d-boost through (no back boost necessary). Do slide through if you d-boost both to avoid extra hits, and to avoid the winds changing on you.
You will not make the jump to the last fan if it is pushing. Mash it down and destroy it if it's pushing.
You should also destroy the last bird enemy no matter what for lag, then get to the boss gate and slide through to Cloud Man.
Boss - Cloud Man
This encounter features bright flashing lights
Buster Fight
If you are doing Cloud first (or otherwise before Burst), you will need the buster fight.
Buster charge speed is abysmal in this game, and a full charge only does 2 damage. As such, avoid charging outside of periods where Cloud Man is invincible (such as when floating up to fire lightning bolts).
Cloud's pattern is fairly predictable. Float around after Mega Man at ground level, just slide under him to dodge. Fire opening charge shots and lemons as you are able. When he floats up, charge while he is invincible or you are dodging. When he comes down and fires lightning along the ground, charge a shot while he shots himself, then add a lemon after his i-frames for "3 damage cycles."
Be careful of the rain pushing Mega Man around and don't get pushed off the platform.
Don't forget to Center Mega Man in the arena after the fight.
Danger Wrap Fight
If you use the Danger Wrap's "Down+Y" function to drop a bomb on the ground, it deals weakness damage to Ccloud without triggering the long weakness animation.
This fight is likely to result in a lot of damage taken, as the wind will constantly push you into Cloud Man. But the speed of damaging Cloud more than makes up for it if you can survive.
Safe Danger Wrap (Bubbles) Fight
Cloud Man has a long if easily avoided "flinch" animation when attacked with a Danger Wrap Bubble, floating up to the top of the screen before it explodes to deal damage.
With relatively good timing, you can get Cloud Man trapped in an infinite loop of getting Danger Wrapped.
This is extremely effective and safe, but also significantly slower than the other Danger Wrap method. It is still faster than a buster fight.