Although part two does feature a death warp, remember that taking hits in part one will cost you some time, even if you needed to lose the health anyway.
### From The Compendium **Click [here](https://www.youtube.com/watch?v=3aFw2n1KfcU) ( [https://www.youtube.com/watch?v=3aFw2n1KfcU](https://www.youtube.com/watch?v=3aFw2n1KfcU) ) for a video detailing beginner/advanced strats for the start of Wily 2.** ### Stage Start Slide once, fire a grenade at the turret. Slide twice. Ball jump up the ladder. If you successfully quickly jump up the ladder, fire a Mega Ball into the Shield Attacker. It will be turning so this destroys it. Slide once to the left. What follows is a semi-tricky Ball Jump Climb. You need to avoid the Shield Attackers on the way up and watch for the floor spine on the high platform. Use as many ball jumps as you feel comfortable with. ### Top Level Kill Shield attackers and Joes with grenades and buster shots. For the exploding boxes near the end, we recommend Flame Sword. Keep in mind if you jump and slash, you can destroy blocks below Mega Man...but if you hit a Shielding Sniper Joe with the attack, it will NOT destroy blocks below you. Proceed to the next screen as quickly as possible. Slide to Rush Jet. # Wily 2 - Rush JetThis section features a death warp near the end that requires playing much of the stage on low health. It is not required, but does save about 16 seconds.
MAKE SURE YOU HAVE THE EXTRA LIFE BEFORE YOU START TAKING DAMAGE.
This section is one long auto scroller. Be mindful that birds and worms do a whole bunch of damage. If you need to take only a little more damage before the end, use the wall climbers firing tiny green fireballs. You are likely to get at least 3 friends to spawn during this section. Although collecting them may make killing enemies easier while you have low health, keep in mind this also produces more drops. You can also ignore them all together.**Remember if you take the death warp, your weapon energy will refill, so feel free to use anything you like in this section. Alternatively, remember to conserve Astro Crush if you do not have the extra life.**
Astro Crush works as a nice screen clearing attack. Homing Sniper (Search Man) also works well for the bats at the end, to ensure they get hit and don't accidently kill Mega Man. ### The Death Warp [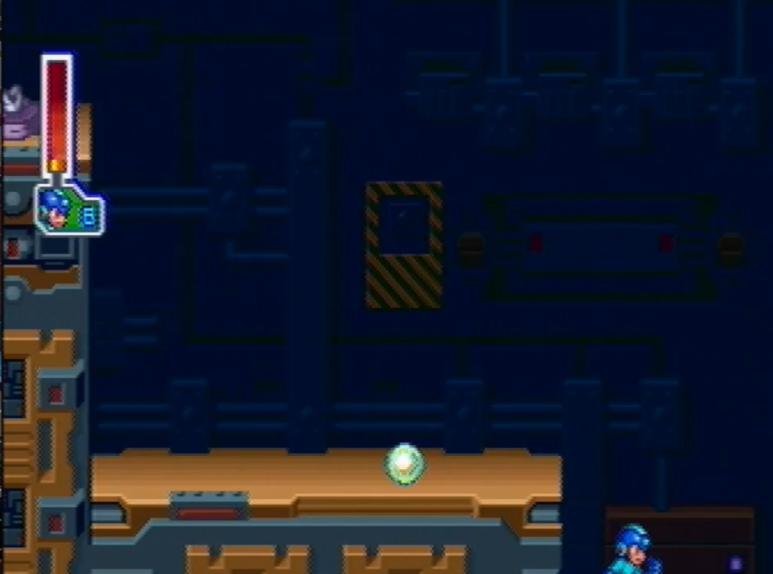](https://goodboyrush.net/uploads/images/gallery/2023-12/wily2-deathwarp.png) After the zig zaggy flight section, there is a large health drop on the ground on a low platform. Just past this in the background is a small blue-violet square on a brown background structure. If you are death warping, position Mega Man on this square to immediately take damage when the dragon spawns. You do not *need* to immediately take damage for the warp to work. You can take 2 or 3 hits (probably more) before dying and it still saves time. As Cleartonic discovered, the checkpoint for the boss fight occurs around here. This death respawns you after the slow "speeding up" section going into the Bliking fight, optimally saving about 16 seconds. # Wily 2 Boss - Bliking [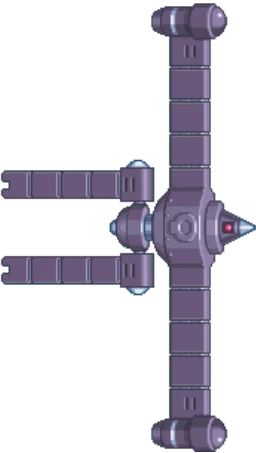](https://goodboyrush.net/uploads/images/gallery/2023-12/bliking.png) ### From The Compendium **HP: 40** (20 per wing, 0 in tail) Damage Chart:| M. Buster | M. Ball | T. Hold | F. Bomb | I. Wave | T. Claw |
| 1:1:1.5 | 1.5 | 1:--- | 1 | 1.5 | 2.5 |
| A. Crush | W. Balloon | F. Sword | H. Sniper | Beat | Eddie |
| 12 | 1 | 2.5 | 1 | 2 | 2 |
| Auto | Rush |
| 2 | 1.5 |
| Body | Wings | Tail | Mine | Missile | Lasers |
| 6 | 3 | 3 | 6 | 4 | 4 |
If you took the death warp, or are otherwise restarting the fight, remember you get a weapon energy refill. Use Astro Crush freely.
Astro Crush's 12 damage in the chart above is 1 use of Astro, hitting twice, for 6 damage each time. This itself is really 3 damage to each wing. You need 7 hits (on each wing) to finish the fight. Most normal patterns can connect with Bliking with one pair of hits with barely enough time for a third hit. You have slightly more time on laser beam patterns than on missile launches. Try to get an extra hit in on one of the cycles to reduce the number of cycles needed by 1. If you do see the tail open, you can destroy each with about 4 hits from Flame Sword. Destroying the tail naturally forces the wings to open on future cycles. Of course, optimally, you only get patterns where the wings open.