Boo Beam
Boo Beam is an annoying boss as it can only be defeated by Crash Bombs, which you can only have 7 of. Casually this boss is highly annoying, and even in a speedrun a single mistake can kill the run.
Whether you zip into this room or come in the main entrance, it is critical you have your ammo usage and path through the room planned out ahead of time.
Casual Requirements
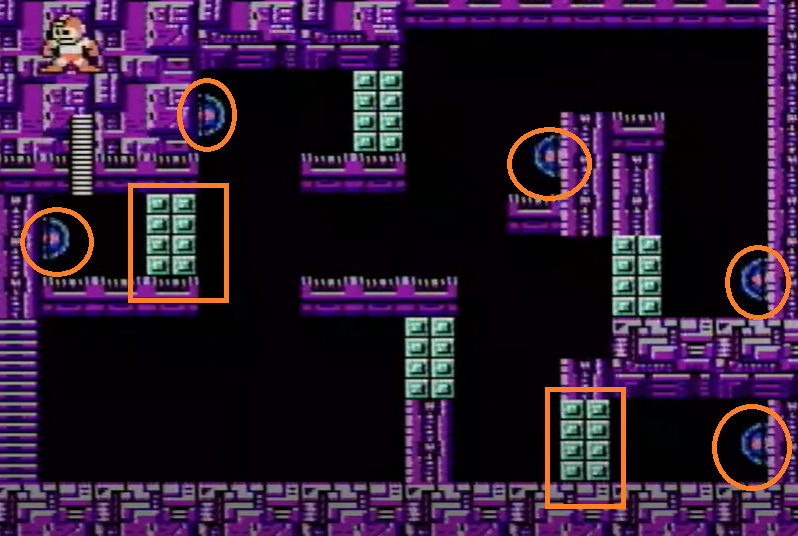
You have exactly enough ammo to destroy the 5 cannons, and the 2 walls directly blocking cannons (bottom right and middle-left), and nothing else.
Without any double hits, you probably want to use item 1 to reach the top left cannon's platform from the start of the room. You can also use item 2 as a platform to the middle. It is possible to jump from the middle to the top around the ledge. Do not destroy the bottom-middle wall unless you know what you're doing.
Remember you can only "escape" the middle-right cannon's pit with item 3 (there is not enough room to spawn Items 1 or 2). Item 3 is also the easiest way to get out of the bottom right area.
Doubles Hits (Without Damage Transfer)
There are 2 places in the room you can destroy two things with one bomb, potentially saving ammo and time.
Top Left
You can destroy the top-most left cannon and the wall blocking the left-most cannon with a single bomb. This is much more forgiving than the others, and destroys two things you must destroy anyway, so you should always go for this.
Bottom Right
You can destroy the bottom two walls on the right side with a single Crash Bomb, however this placement is significantly tighter than the top left. Additionally, you only need the destroy the bottom wall, so missing can be catastrophic.
Destroying both walls does three things.
- Destroying the bottom wall is required anyway.
- Destroying the upper wall saves time for any method of destroying the middle right cannon, even without a damage transfer.
- Destroying the upper wall allows you to attempt a damage transfer, which can save a crash bomb
Extra Crash Bombs in Wily 5
Executing the top left and not using an extra bomb on the bottom right gives you only one extra bomb.
Executing both double hits AND a Damage Transfer (see below) gives you two extra crash bombs for Wily 5.
Each extra crash bomb significantly reduces the time needed to defeat the Wily machine.
The Damage Transfer
Many people have seen a player walk into the bottom right cannon and it mysteriously gets destroyed. This is the damage transfer.
You need enough health to survive the attempt.
Top Setup
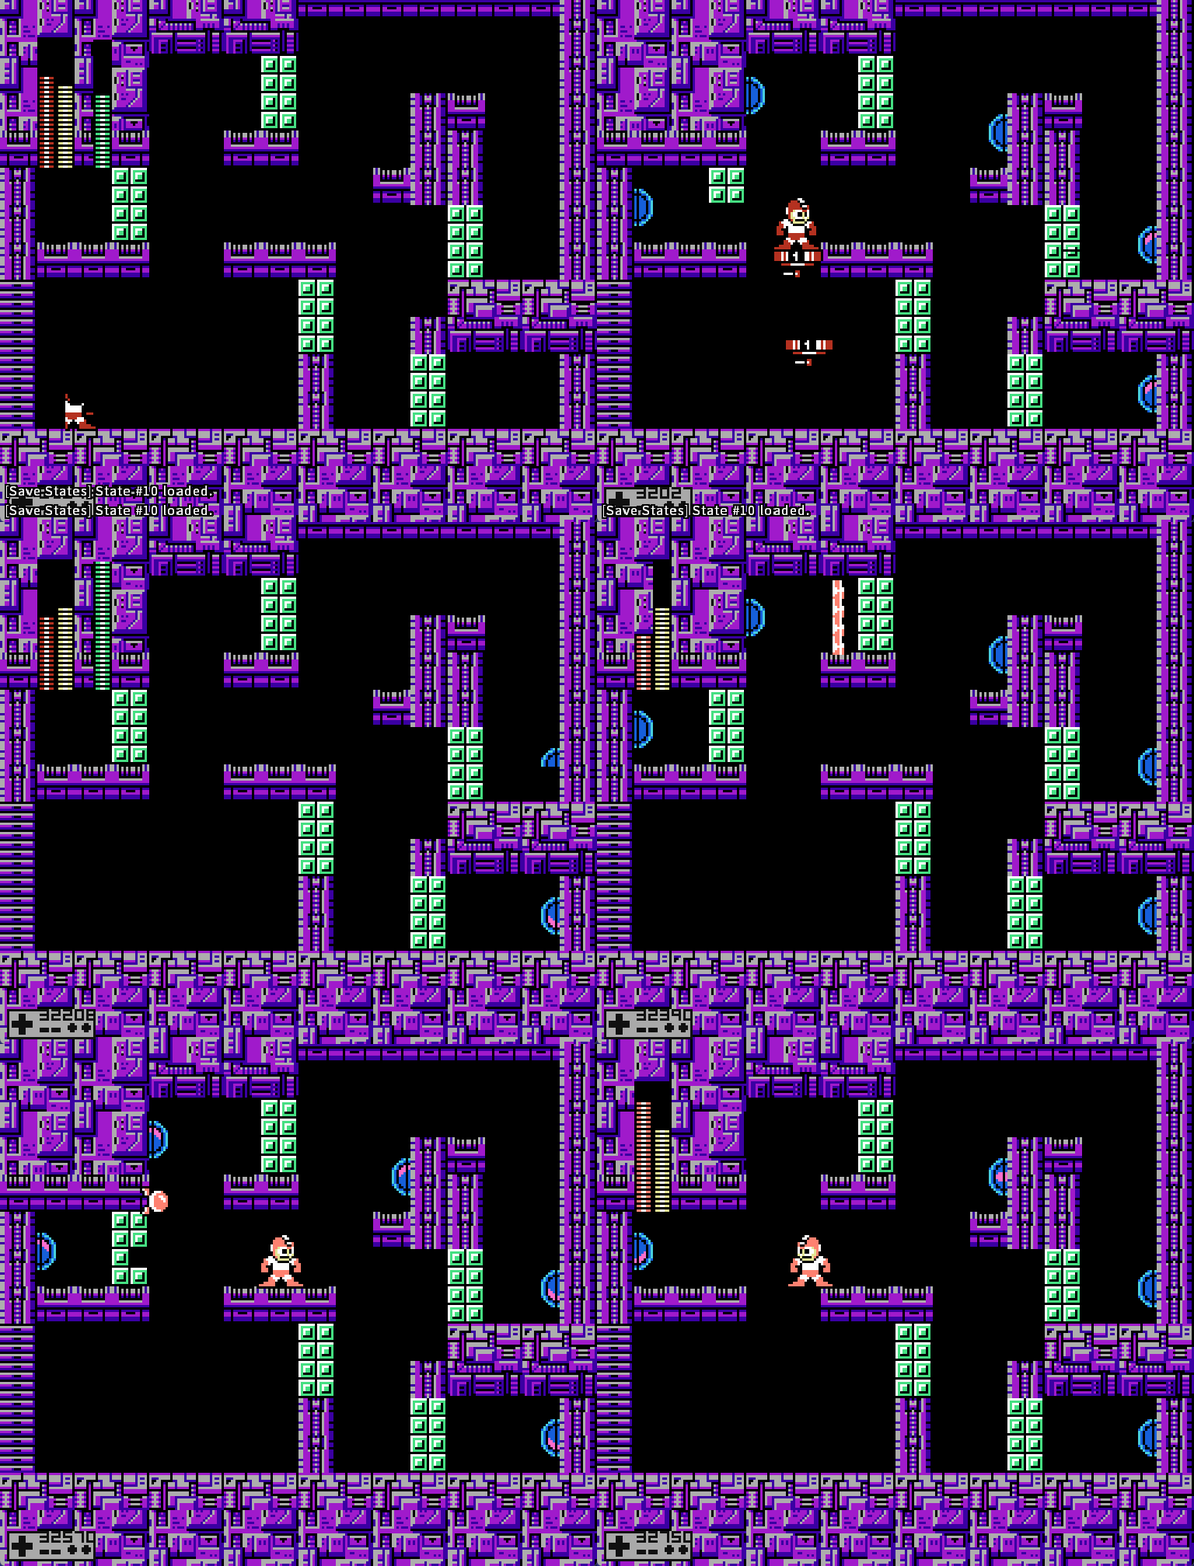
You can stand on the top middle platform, and take a shot from the top-center cannon. Don't get hit again, and you should be able to end the fight by damage transferring it into the bottom cannon.
Jump Setup
A common setup is to have the bottom two walls destroyed and destroy the bottom two cannons. Get close to the middle-right cannon, then jump and shoot your bomb just over the cannon without destroying it and hold right against the wall. Mega Man will fall against the cannon. You need to then walk all the way around and into to the bottom-right cannon while the explosion is ongoing.
Shoka Setup
I'm not as familiar with this one but it involves walking into the middle-right cannon.
Why Does This Work At All?!
It has something to do with the last spot Mega Man took damage and the ongoing explosion.
Backup - Avoiding Damage with Pausing
Besides the obvious "get good and dodge", there is a pause trick to avoid damage. When you see the cannons flashing and about to fire, you can "mash start". The shots from cannons will pass harmlessly through Mega Man's teleport animation, and you will pause again (to restart the animation) before they can damage Mega Man. Somewhat obviously, this "wastes time" as you cannot act during the animation, and pausing the game itself takes time, but
Backups for No-Reset
If you run out of ammo, this is typically always a reset, especially after a few deathless runs are completed. That said, you may need a race or other no-reset backup.
The most important thing to remember is that while the cannons respawn, the walls do not unless you game over. If you know you will not be able to finish the fight, you have two options.
Immediate Game Over
Depending on how many lives you have left (or if you know you have none), a game over is a fast way of refilling ammo to Crash without having to farm Crash (or any Item 1/2/3 you use in the fight). However, remember all walls will respawn.
Farming for Ammo
If you're comfortable redoing the elevator rooms with your current Item ammo, and farming the Joes for ammo, you can destroy the walls and come back. The walls don't respawn, so use what Crash you have left to clear out the required walls. You could destroy more, but that's more ammo you will need to farm back. You need 5 Bombs for all cannons (4 if you know the damage transfer).
You can farm ammo from either the telles in a safe spot, or the Joes in mechs. For the Joes, use Quick Boomerangs to clear out the Joes, scrolling back and forth.
Remember to switch to Crash Bombs before collecting Ammo. It's also easier to farm in Normal mode than Difficult.
Due to the difficulty and randomness in farming, you may want to just take the game over on the spike rooms of the elevator section anyway.
Other Backups
Climbing with Double Item 1
This is also useful in Zipless, where you must enter through the main entrance gate.
This is similar to item 1 placements in Wily 1 and 2, where you jump and place an item 1 at the top of the jump, then a second one as you land, along you to jump to the first platform and then the second and gain significant height.


No comments to display
No comments to display