
Screen 1-3 - Single screen rooms
Let's Go Mets! The Stage
Mr. Cab
Room 1
Relatively straight forward.
One slide, grab the ladder. Jump off, full slide, slide jump to the ladder.
You may sometimes miss the jump of the slide on the last one. That usually happen when your movement isn't so good on your first slide or you may have jumped too high off the ladder.
Room 2 - Single Stair Room
Another fairly easy room, this room contains 2 mets.
To take care of the first one, you simply A + B and jump off the ladder. For the second one, just A then B (not A + B) or else the shot will be too low.
If you want to optimize a bit more you can add extra slides to speed up the room.

The second slide is actually harder to save time with as you may jump slide a bit too far. Making the ladder grab a bit slower.
Room 3 - Double Stair Room
This is the first tight room of the stage that can be tough to do without taking damage or just clean in general. There's several things to pay attention in it.
First 2 Mets
Like the previous room, the first Met can get taken care off with a simple A + B as you jump off the ladder
The second met is a THREE HP met. There's various ways to handle it.
Just walk
If your mash might be inconsistent or a bit on the slow side. You can jump spam A and B as you walk towards the met
Any extra shot will create extra lag in this room
Back damage boost strat
A bit harder but you can use the forward bullet to take a back boost off of it
You can optimize this strat by making it to the stair the Met is standing on
Slide + Mash
The optimal strat, you slide towards the met but you jump out off it to get 3 shots very rapidly
Last 2 Mets
You need to pay very close attention to where this met will jump.
There's 2 differents jump height the met can do, a low or a high jump. As you execute you may not have the time to check whatever jump the met is doing but you can easily see it depending of where that Met lands
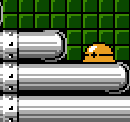
Fast Pattern - Low jump
If the Met lands here, it means it will open a bit quicker, meaning you need get ready to kill it as soon as you get through the first 2 mets.

The small slide is optional, can make it harder or easier depending of how you play. You can cut it out if you dont like it 
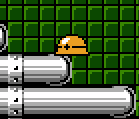
Slow Pattern - High jump

On the slow pattern the Met will delay its opening a bit, meaning you need to slow yourself down. You can do that by walking very close to the Met to the point of nearly bonking the stair he's on, and then a regular A + B
Reactions to mistakes
Since these Mets are on a timer the moment you are in their range, you need to be careful in case you miss the 2nd Met (most common mistake)
In that case, you need to prepare yourself to hit that Met earlier than usual.
Here's a mistake case scenario for both patterns
Full Room Examples + Ladder grab
You dont wanna kill the last Met, its a waste of time. Jump to grab the ladder as you dodge the last Met's shot
You can speed it up by sliding.
The higher you jump, the slower you'll be, try a low jump. The reason being that unlike some Mega Man games, you are unable to grab ladder offscreen
No comments to display
No comments to display